The Wardrobe
Introduction
Materials Used
- 6 Pack of 8' Long Pine Panels ($10.99 at Lowes)
- Pax Brand Pre-Fabricated Wardrobe ($31.99 at Ikea)
- Five (5) 8' Long 2" X 3" Studs ($2.09 Each at Home Depot)
- One 4" Wide X 2' Long Flat Steel Piece ($11.99 at Home Depot)
- One 90 Degree 2' Long Steel Angle ($12.09 at Home Depot)
- Six (6) Liberty Brand Inlay Cabinet Hinges ($6.59/Pair at Home Depot)
- One 1" Diameter Rare Earth Magnet and Mounting Bracket ($15.66 on Amazon)
- 4 Pack Stainless Steel Latches ($12.07 on Amazon)
- 20' Roll by 8" Wide Contact Paper ($5.59 at Target)
- One (1) Bottle of Lepage Wood Glue (Purchased Earlier)
- Many Various Fasteners, Including Rivet Nuts Purchased Previously
- Extra 1/4" Thick Hardboard Purchased Earlier for the Coffee Table
Tools Used
- Router with Various Bits
- Palm Sander
- Skil Saw
- Drills and Bits/Drives
- Kreg Hole Jig
- C-Clamps
- Pipe lamps
- Carpenters Square and Measuring Tape
- Socket Set
- Vice Grips and Box Wrenches (For Installing Rivet Nuts)
Step 1 - Assemble the Back Frame and Secure to Van
|
Next I began building the frame rearwards along the van wall, and cut three horizontal pieces with the table saw, and used the Kreg hole jig to pilot drill the holes. I made them just long enough to still give me about a quarter inch gap between the outer side of the wardrobe and the folding bed. I located two rivet nuts I previously installed (one closer to the ceiling and a second closer to the floor) and used them to secure two of the horizontal frame boards with additional hex bolts. I had to remove a few of the pine panels to access one of them, but this was a quick process.
Now I needed to determine how I would give the wardrobe support towards the center of the van, where the main door would be. It was going to be about the same depth as the coffee table, meaning it would extend about 22 inches from the wall of the van. I determined I would be able to integrate the side of the wardrobe facing the back of the van into the coffee table for plenty of support on the lower half, and for the upper half, I needed to determine a way to utilize the van ceiling cross beams. |

First piece of the frame securely mounted!
|
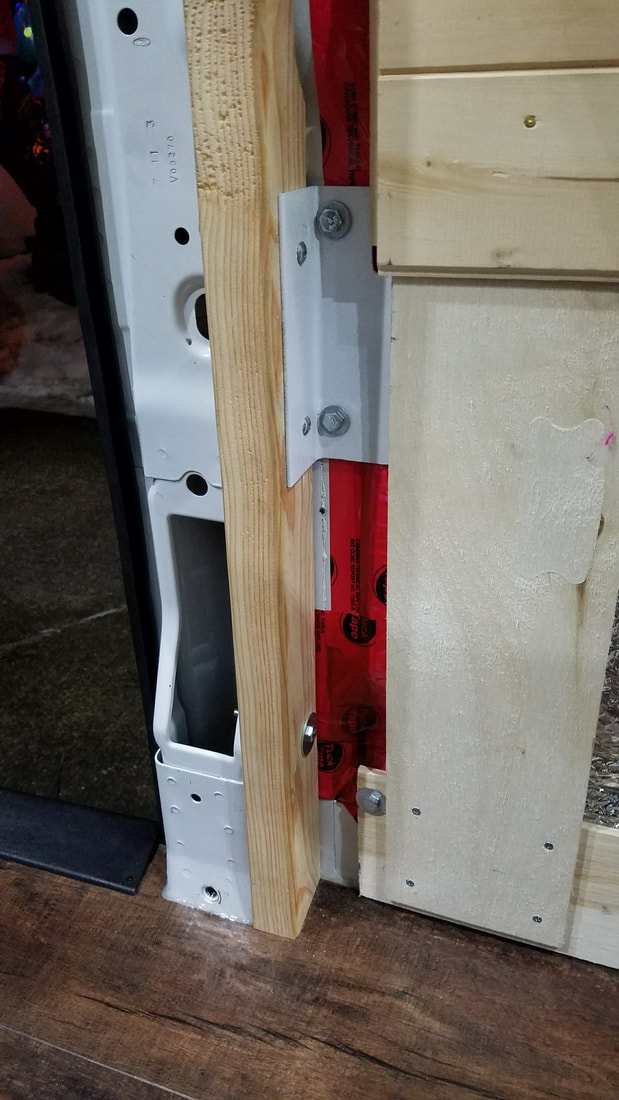
Close up of the angle iron. Also notice the bottom of the piece is also connected with a rivet nut directly into the stiffener
|
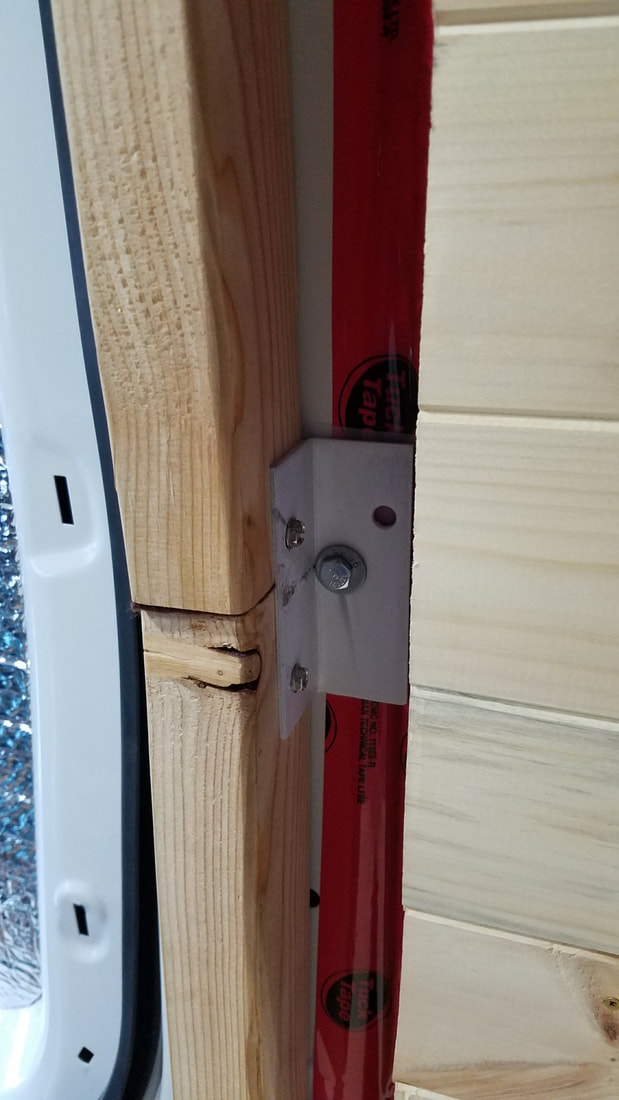
Close up of the second angle bracket joining the first two brards
|
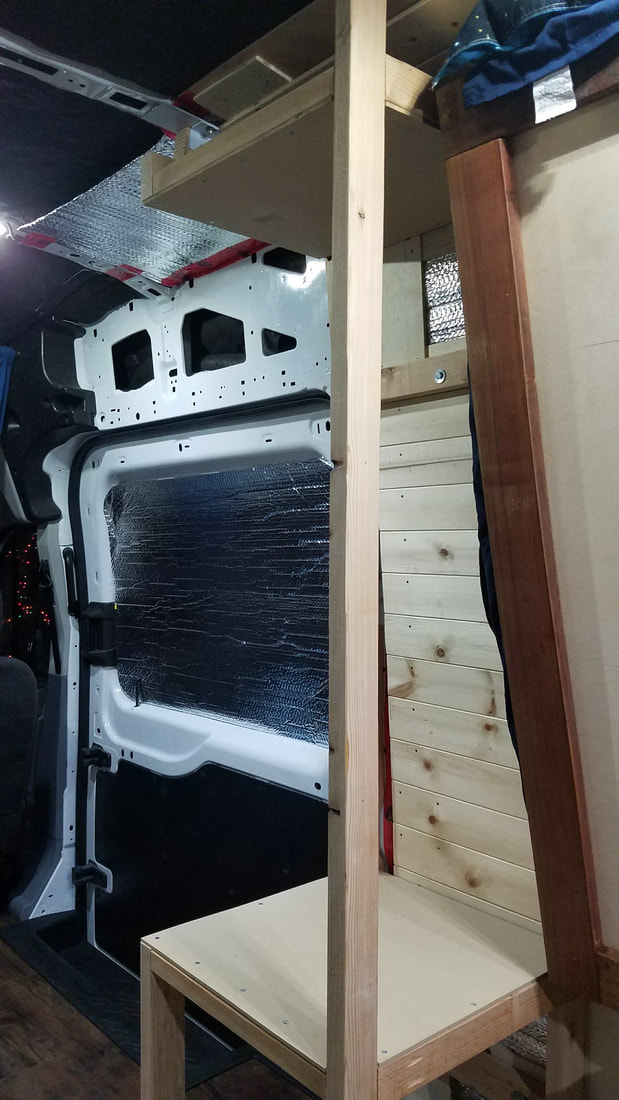
Step 2 - Build the Frame Outwards

4 inch flat steel mounted to the ceiling of the van will provide support for the front of the wardrobe
|
Beginning to build the remainder of the frame
|
To do this, I mounted a 4 inch wide piece of flat steel to the ceiling cross beam with two rivet nuts. This gave me a larger area in which to attach an additional angle bracket, that will mount to the top frame boards. Note I also spray painted these white to prevent rust. Next I had to cut the frame piece shown at the top of the photo to the left. This connected to the flat steel with another bracket, however cutting it to fit was another time consuming dance of running back and forth from the work bench to the van and so forth. Eventually the piece fit and I used wood screws to connect the bracket to the board, and self drilling machine screws to connect the bracket to the flat steel. This provided plenty of support to keep the top of the wardrobe stable in the front-back direction. Also note that before adding the frame around the ceiling, I added a few more pine panels (you will see some added between the two photos at left). The wood paneling and Reflectix insulation are more or less being added as we go throughout our van conversion.
I then began building the rest of the frame outwards, adding pieces of correct length to the bottom of the wardrobe, and a couple places between which would also serve as permanent shelves when the 1/4" hardboard is added. I also added a full height board from floor to ceiling which will serve as the hinge support for the door later on. |
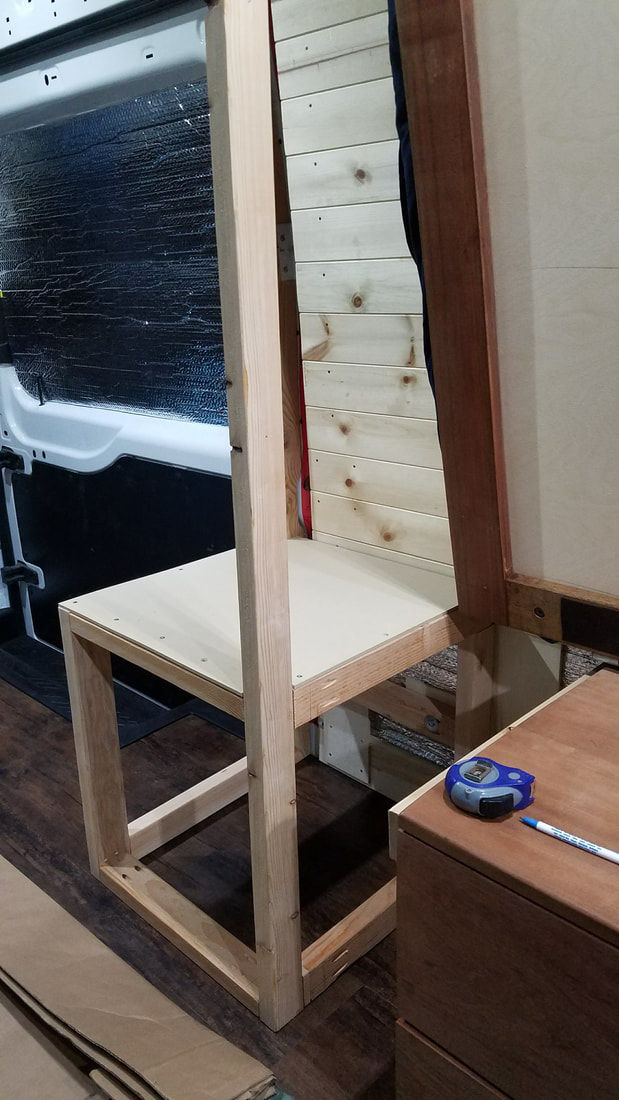
Lower half of the frame coming together. I added the 1/4" hardboard to serve as both torsional support, and as a permanent shelf!
|
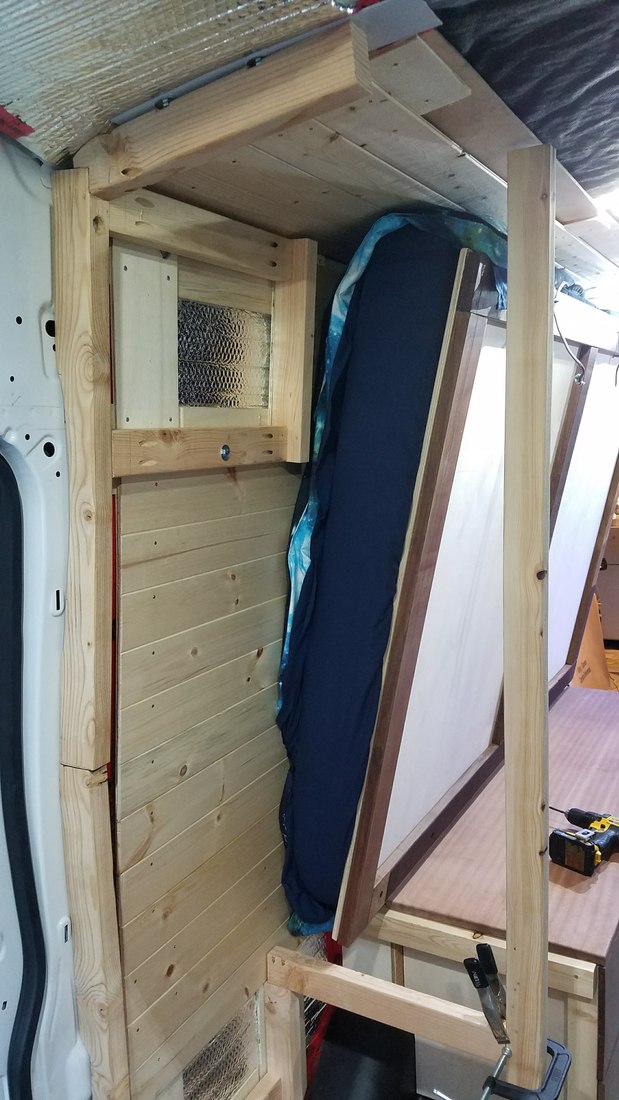
Adding another shelf at the top
|
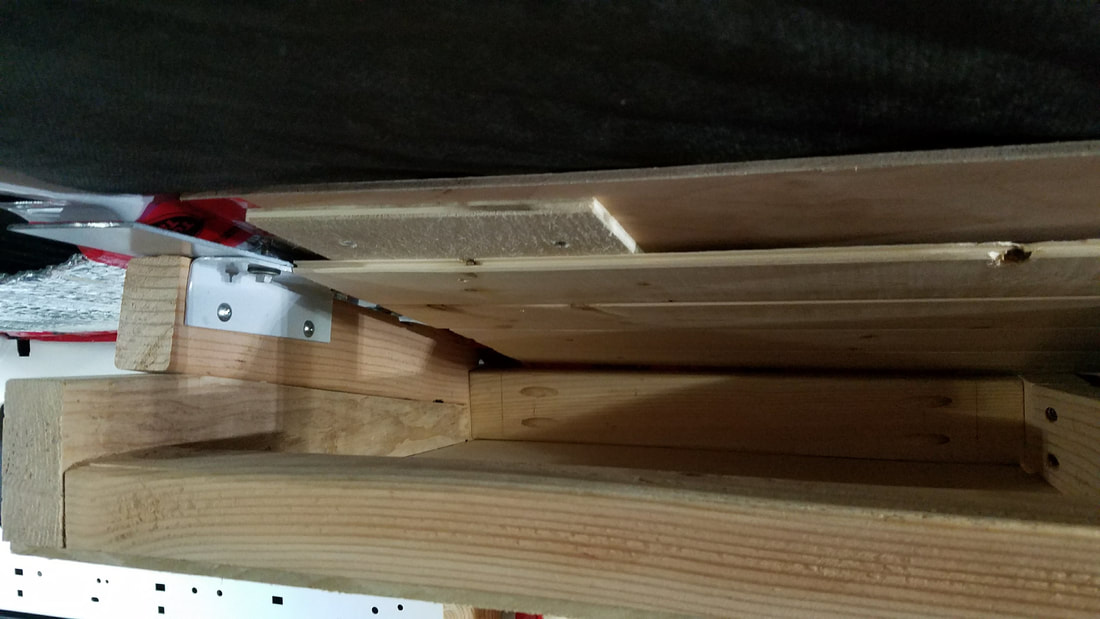
Close up look into the top shelf. Notice the angle bracket connected to the flat steel on the ceiling.
In the photo above, the complex cuts I had to make can be seen. Since the ceiling and the side of the van are both angled, and curved, it is difficult to make cabinetry, which ideally is built with all 90 degree angles. There are probably many ways to build cabinet frames inside the van so feel free to try different tactics and see what works!
I also added a third permanent shelf about 12 inches below the top one with another square |
Step 3 - Cut and Install the Sides
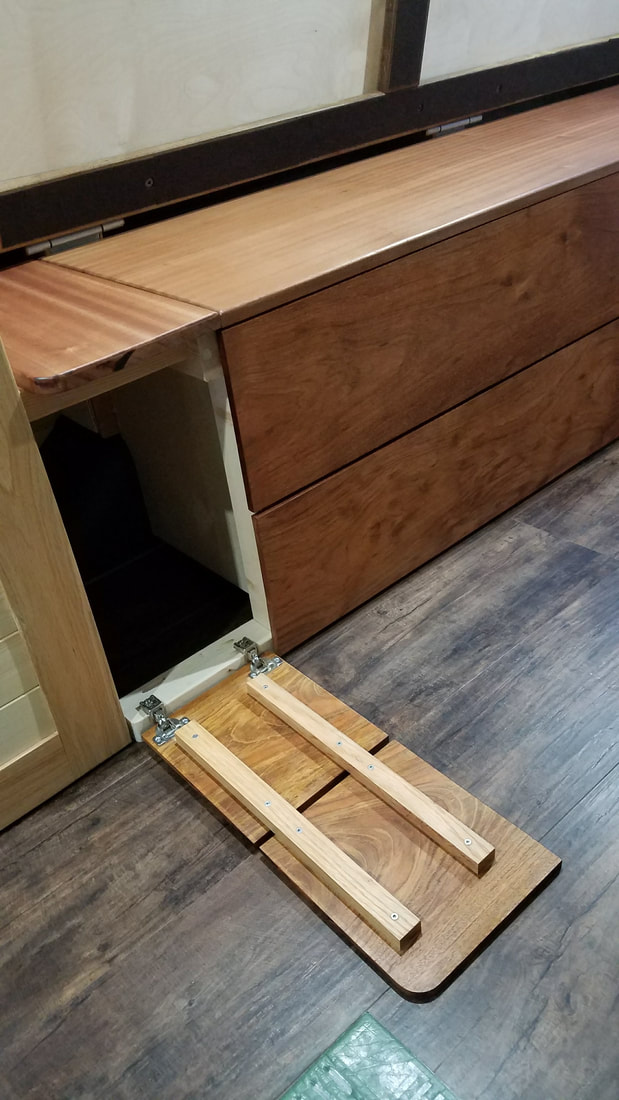
I then did the side facing the front of the van, however in two pieces, since the lower portion of this side will also be a door, to allow easy access to the bottom part of the wardrobe, where we will store most of our shoes. Having easy access from outside the van will allow us to easily put dirty shoes in a drying tray at the bottom of the wardrobe without tracking them in. Overall, installing the sides wasn't as difficult as I thought it would be. The only tricky part was making sure I cut the panels correctly.
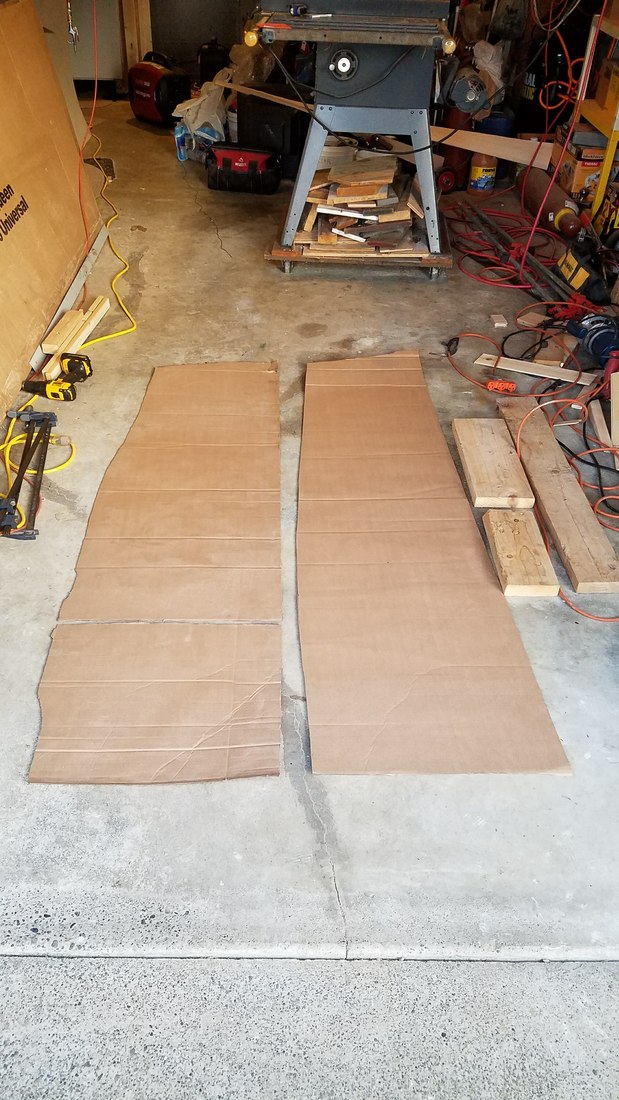
My cardboard cut outs
|

Two side panels installed!
|
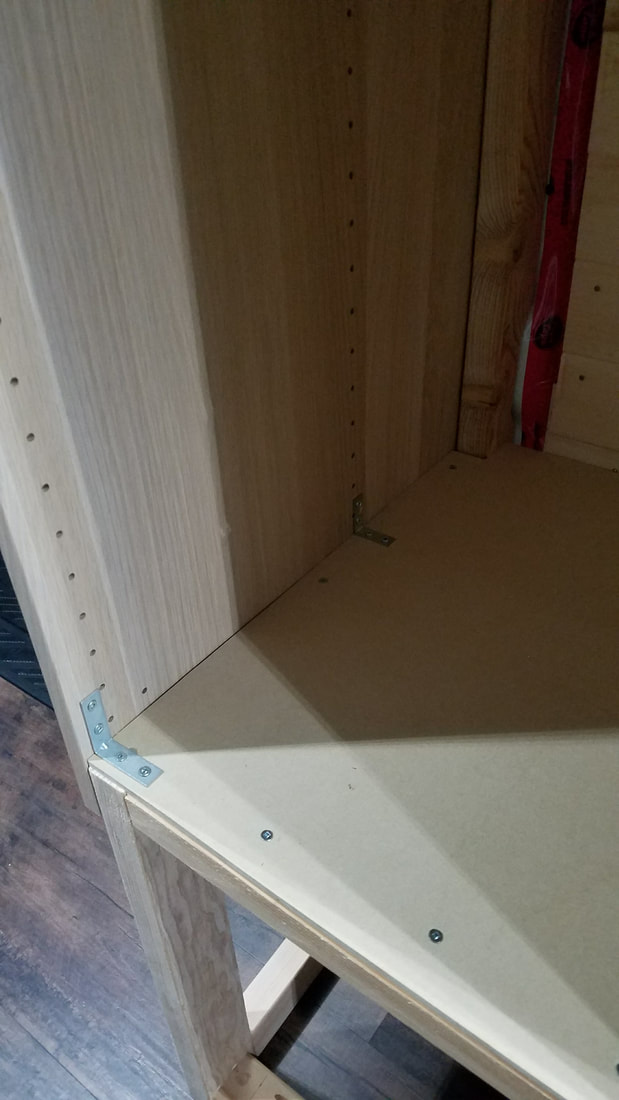
Interior brackets to mount the side panels where I didn't want screw heads visible
|
Step 4 - Build the Main Door
Next we carefully measured what the final width of the door was going to be based on the cabinet box I had already built inside the van, and cut three short pieces, one for the top, middle and bottom of the door. My dad suggested to cut a tongue in each end of these 3 shorter pieces so they could also fit inside the end boards along with the panels. Doing this required precision trimming on the table saw to make sure both the length of the tongue, and the offset from each face matched the dato for the location it would butt against. Anything other than a perfect fit would show either a gap or a non-flush fit when connected.
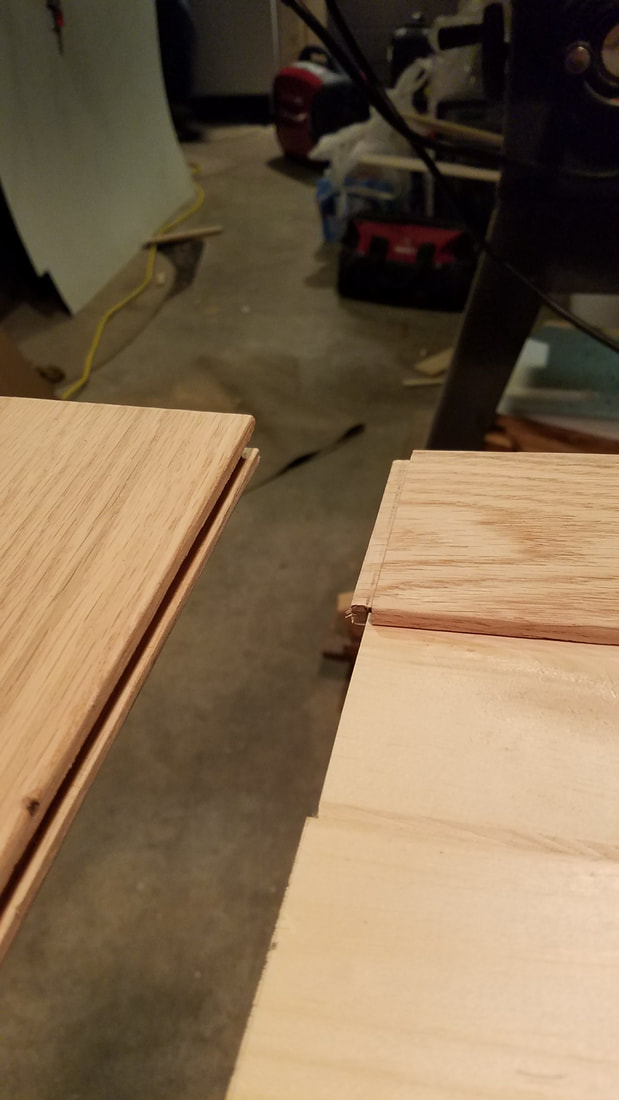
Notice the dato groove in the edge of the oak
|
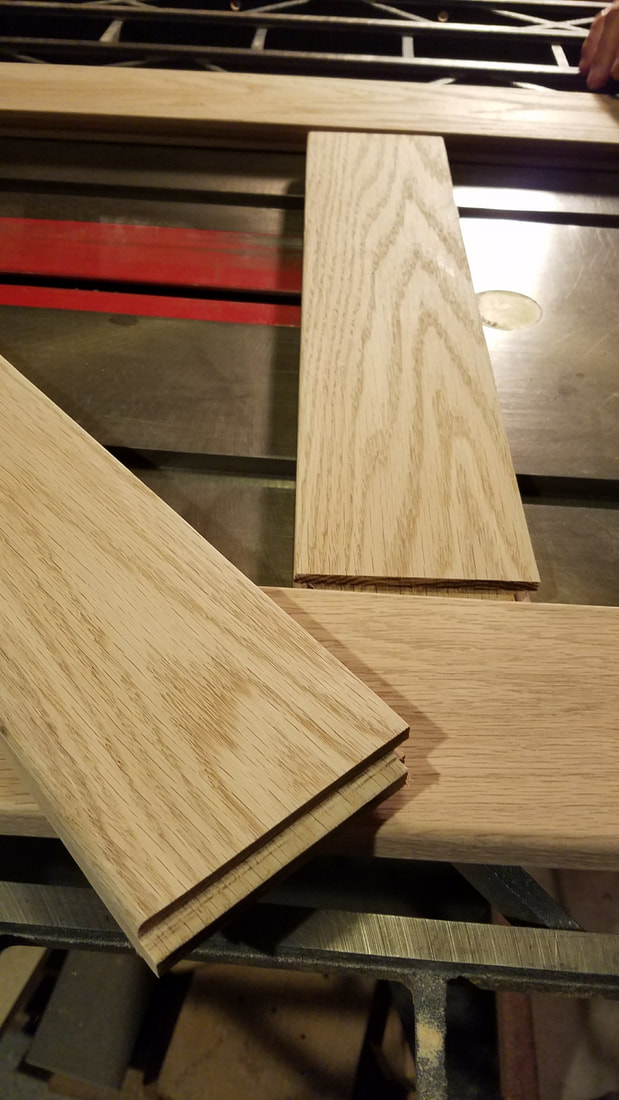
Cutting the tongue to fit inside the dato
|
Once all 3 horizontal pieces were finished and 6 tongues were made (two for each piece), we dry fit the door frame against the cabinet and confirmed it would fit. Next I cut 20 pieces of the pine paneling all the same length, and we began assembling the door. I glued the bottom to one of the sides first, and we then worked up to the top, fitting the panels, the middle oak piece, and the top piece all together, and finishing by gluing the other side on, and sandwiching everything together. We only glued the oak boards together, and left the pine panels to sit slightly loose inside the dato groove to allow for any expansion. We clamped it all together with pipe clamps and let the glue dry overnight.
The next morning, I thoroughly sanded the oak with the palm sander, and applied a nice varnish to enhance the grain of the wood and protect it. 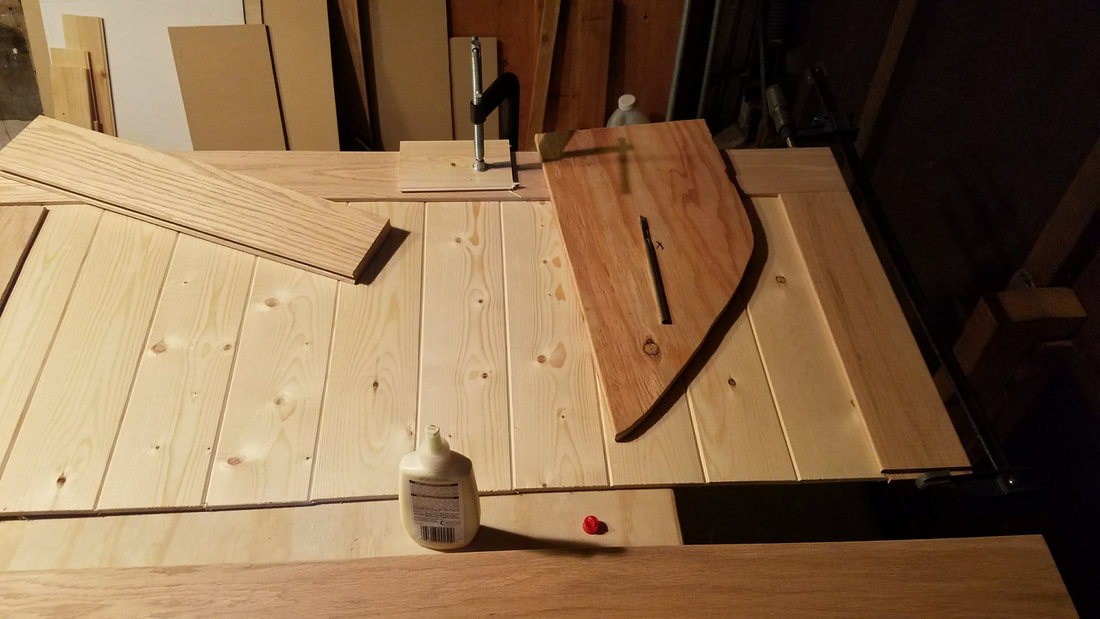
Assembling the door
|
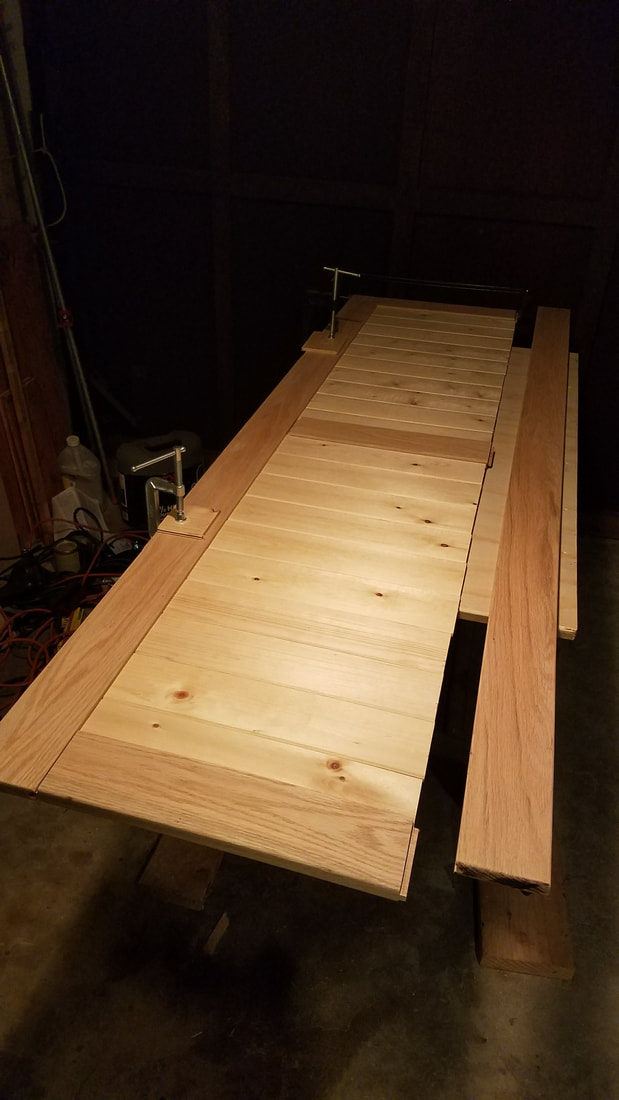
Attaching the final side of the door, which will sandwich everything together
|
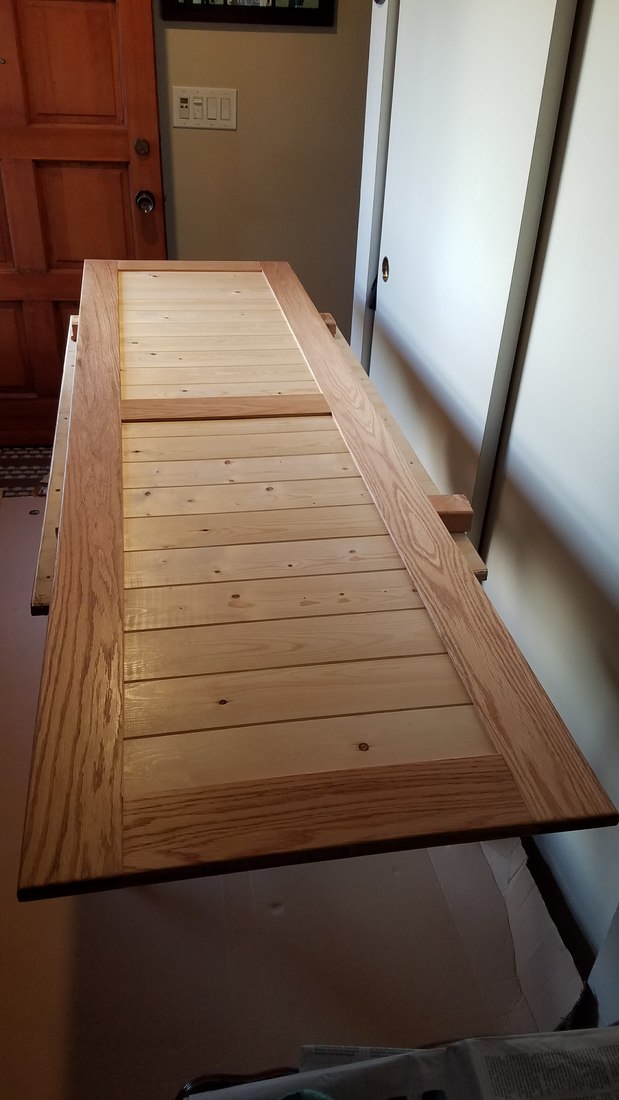
A completed door ready for varnish!
|
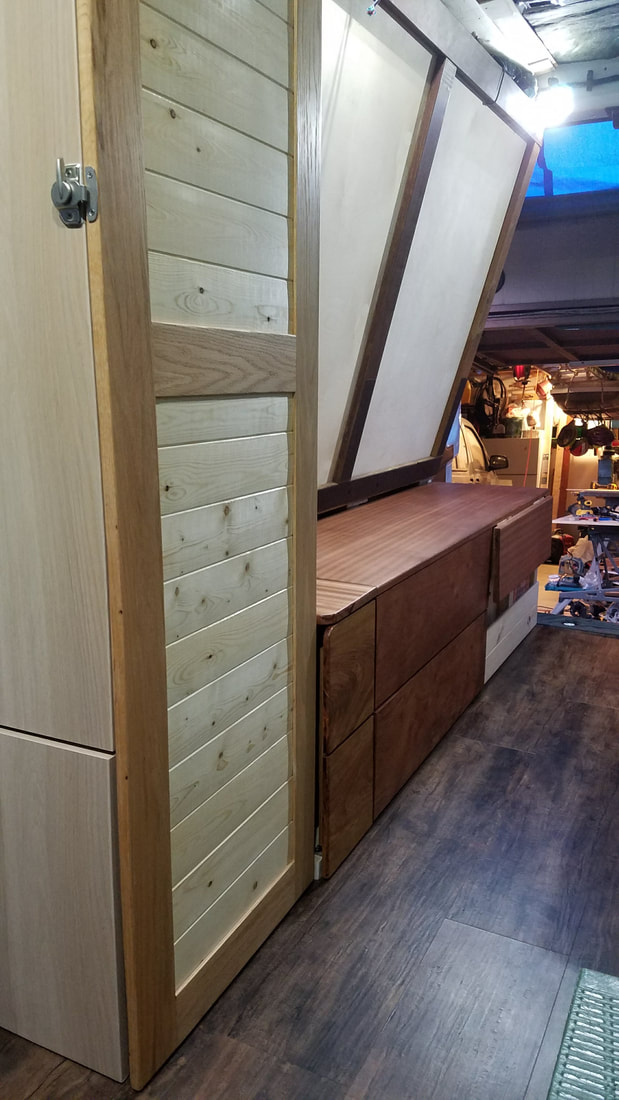
Step 5 - Attach the Hinges and Install the DoorThe hinges I bought for the door are surprisingly complicated. They are entirely hidden from the outside, and need to be inset into the inside of the door at just the right spot so the door opens correctly without hitting the cabinet. Following the directions included with the hinges I bought, I took the router and cut out a perfect circle 35mm in diameter, and 0.4" deep where each hinge will be, and mounted them inside these holes. Then I had to cut out a portion of the cabinet frame since the hinge only has a 1.25" built in offset. Since the frame is 1.5" wide, and the side of the cabinet is another 3/4" thick, getting the edge of the door to be flush with the side of the cabinet required me to remove a 3/4" square from the inside of the frame board for each hinge. This of course had to be done with the router inside the van since the cabinet and frame were already installed, therefore making a horrendous mess. Thank goodness for vacuum cleaners!
With the correct amount of offset now available, I simply screwed each hinge to the frame of the cabinet and viola! We have a beautiful cabinet door. I then repeated this process for the smaller door at the bottom of the side facing the front of the van. To finish off the exterior of the cabinet, I added a few coat hooks that can hold well over 6 coats/shirts, and added a latch to hold the cabinet door closed when driving. I will add handles, which we have a bunch of small gym climbing holds for later, when we add all the handles for each door and drawer. |
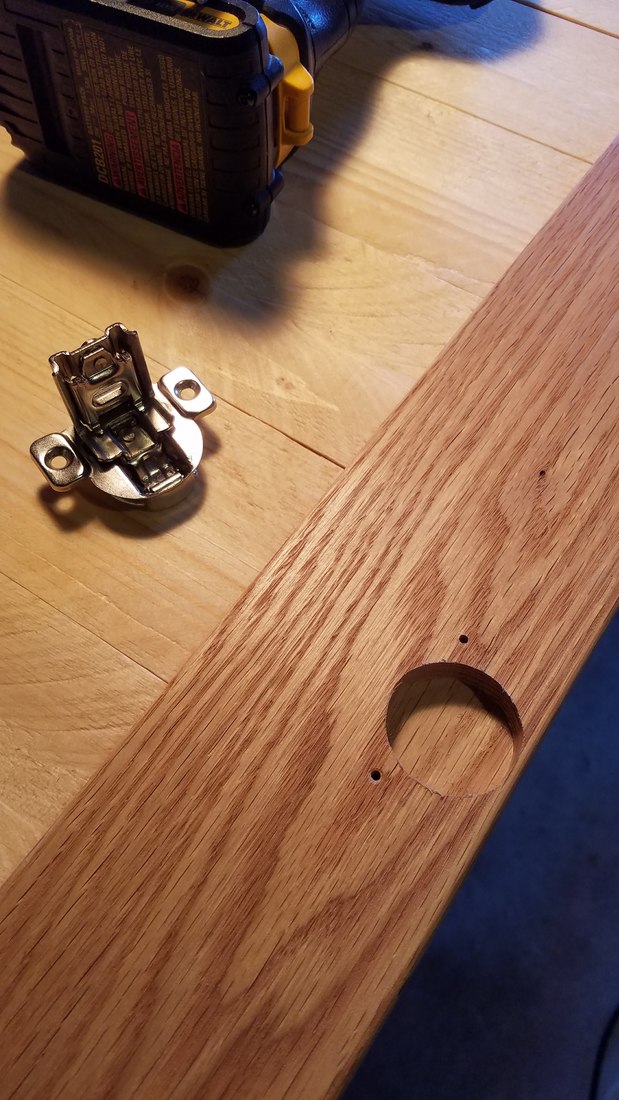
Routing out the hole on the inside of the door for each hinge
|
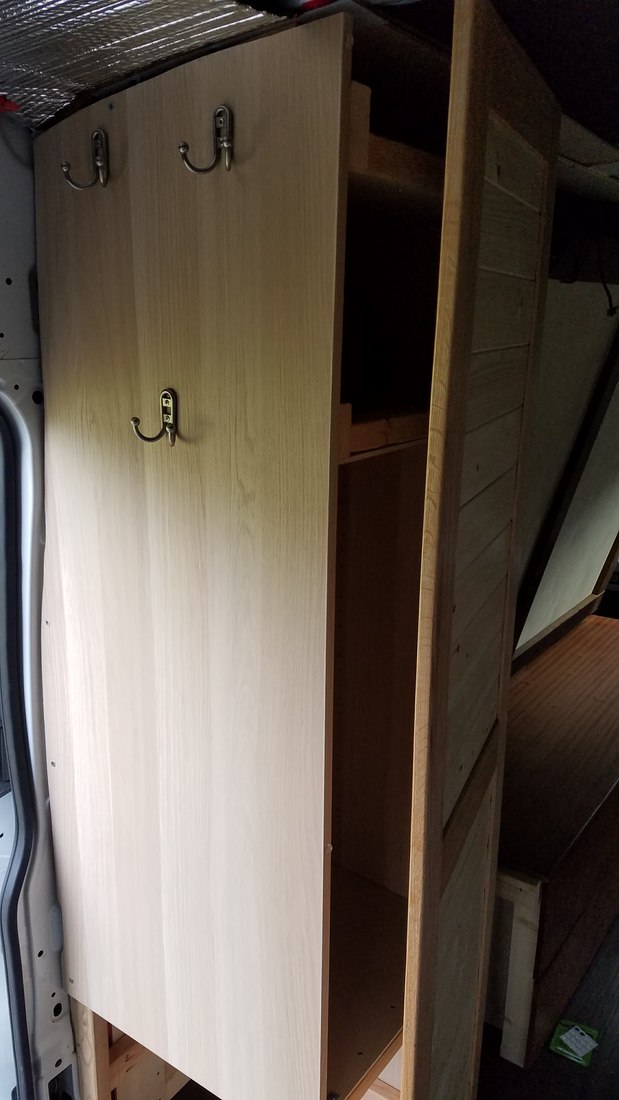
Cabinet door installed. Also notice the coat hooks on the side facing the front of the van
|
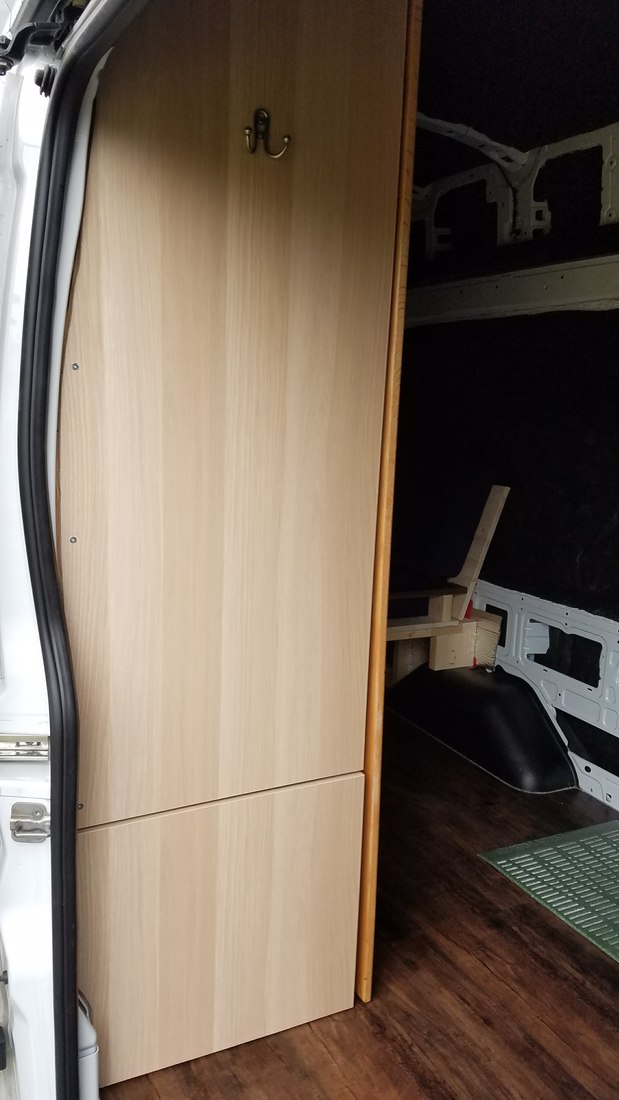
Small door for shoe access closed...
|

Small door for shoe access open!
|
Step 6 - Install the Interior Shelves
|
Once I finished the interior, I then completed the small area between the wardrobe and the coffee table. I simply added a few short pieces of 2 X 3 studs to integrate the side of the wardrobe with the front of the coffee table, and add further stiffness. I went back to crosscut lumber in Seattle and bought a little more of the two red hardwoods, and extended the table all the way up to the edge of the wardrobe, and built a small access door with the same Brazilian Cherry hardwood the drawer fronts are composed of. This small door opens down to reveal an additional storage area.
|
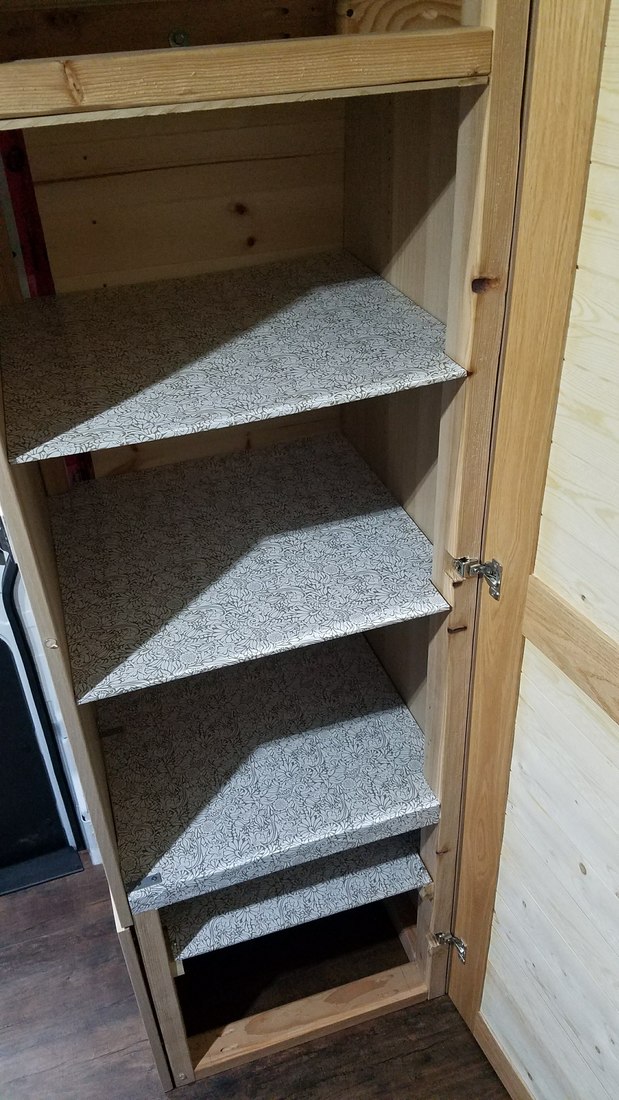
The interior of our wardrobe
|
-
{{#owner}}
-
{{#url}}
{{#avatarSrc}}
{{name}} {{/url}} {{^url}} {{#avatar}} {{& avatar}} {{/avatar}} {{name}} {{/url}} - {{/owner}} {{#created}}
- {{created}} {{/created}}