Coffee Table Installation
Introduction
There will be two sets of drawers coming out of the table. One set will open from the front half of the long side into the van, while the others will open out the back, and can only be accessed when the back doors are open. The thickness of the frame, plywood and drawer slides makes the drawers a bit smaller than the table width but that is a necessary evil. We opted to go with quality, and got nice hardwoods for the table surface and the drawer fronts.
Materials Used
- Kreg Pocket Hole Jig ($26.98 at Home Depot)
- One (1) 50 pack box of 2.5" Long Kreg Screws ($6.22 at Home Depot)
- Two (2) 4 Packs 90 Degree Angle Braces ($1.64 Each at Home Depot)
- Two (2) 4' X 4' X 1/4" Thick MDT Hardboard for Drawer Bottoms ($15.37 Each at Home Depot)
- Three (3) 8" Wide by 8' Long by 1/2" Thick Pre-finished Drawer Sides (US$21.50 each at Crosscut Lumber in Seattle)
- One (1) 9.5" Wide by 10' Long by 1/2" Thick Brazilian Cherry Hardwood (Jatoba) Board (US$64 at Crosscut Lumber in Seattle)
- One (1) 9.25" Wide by 14' Long by 3/4" Thick Sapele Hardwood Board (US$100 at Crosscut Lumber in Seattle)
- One (1) Bottle Lepage Wood Glue ($5.07 at Home Depot)
- Two (2) Pairs 32" Long Ryadon Drawer Slides ($34.99 Each at Gregg Distributors)
- Two (2) Pairs 14" Long Ryadon Drawer Slides ($15.99 Each at Gregg Distributors)
- Many Fasteners (Did not keep track of them all!)
- We also used Pieces of the Birch 5' X 5' Plywood from the Platform Bed for Parts of the Coffee Table
Tools Used
- Jig Saw
- Drill with Bits and Screw Drives
- Router with Rounding Bit
- Palm Sander with Various Grit Sandpaper
- Eight (8) Each of C-Clamps and Pipe Clamps (Borrowed from my dad in WA)
- Kreg Pocket Hole Jig and Corresponding Screws
- Table Saw (Borrowed from Neighbor in Edmonton)
- Skil Saw (Borrowed from my Dad)
- Straightedges
- Carpenters Square
- Measuring Tape and Pen
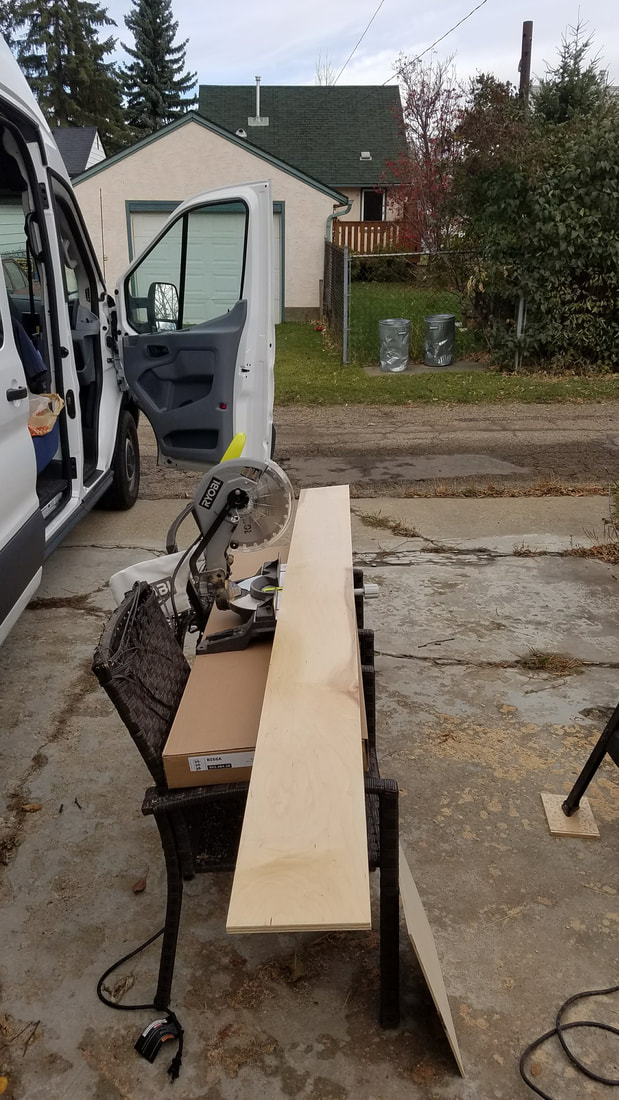
Step 1 - Cut and Assemble the 2" X 3" Studs & Plywood for the Frame
|
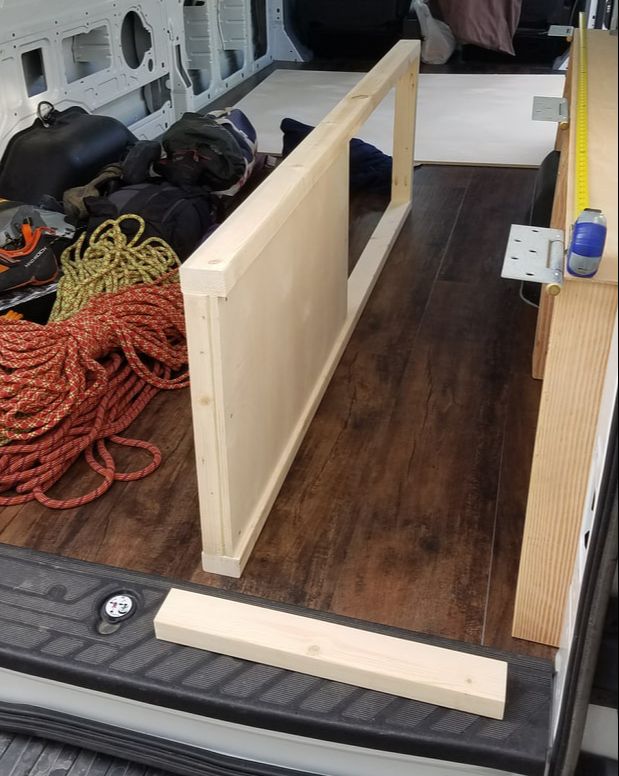
Since we decided to match the table length with the bed supports, our table was to be 67 inches long. With the length and width now determined, we decided where we would like to have drawers, and cut the 8' long 2" X 3" studs to the lengths we needed using a chop saw. These would become the frame for the table. Three 67" pieces and various smaller pieces were all cut and sanded. Then we used the Kreg pocket hole jig to drill two holes on each end of only the shorter pieces, aligning and securing the jig to the correct place on the boards as described in the instructions (placement of the jig differs for different thicknesses of wood). For the 1.5 inch thick studs, the end of the jig needed to be 1.25 inches from the end of the board, and the collar on the provided drill bit set to 4.25 inches. After clamping the jig simply drill the hole until the collar is flush with the jig.
We drilled the pocket holes into each of the smaller pieces since they were easier to work with, then screwed them onto the long 67" pieces, adding wood glue for each joint. Before we knew it, we had the front of the table frame assembled! Note the two vertical pieces in the middle and back end are turned 90 degrees to maximize the width for the drawers that will open out the back side (See photo just below) |
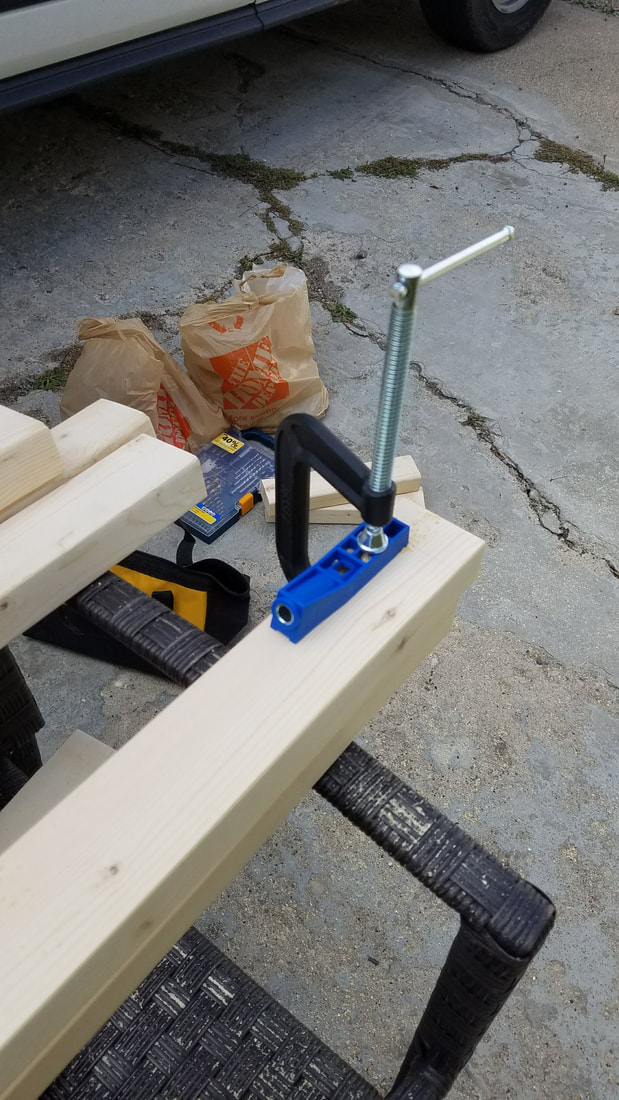
Clamping the Kreg jig onto the 2" X 3" board
|
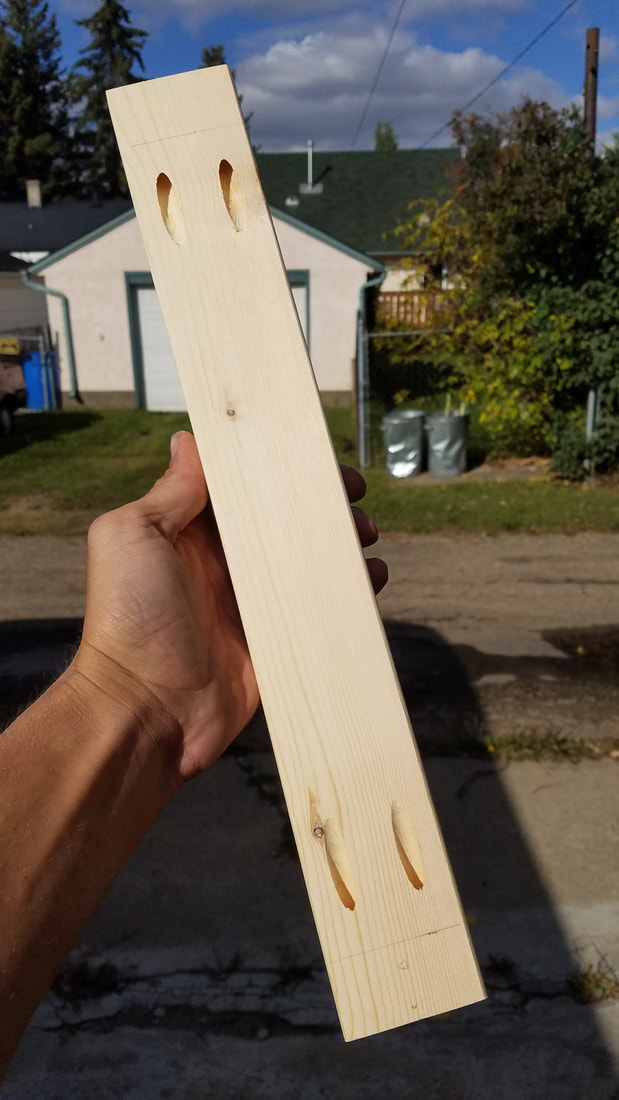
Four completed holes!
|
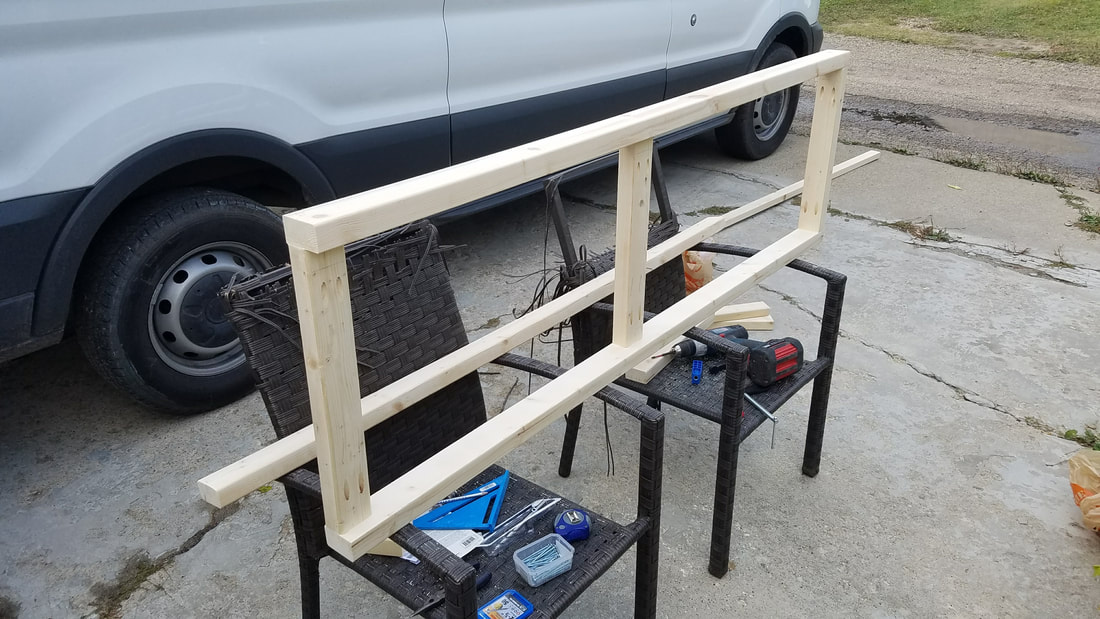
Assembling the front part of the table frame!
Next, using pieces of the Birch plywood we bought for the bed platform (since there was extra) we cut pieces with the jig saw to place in the spaces where there would not be drawers, and along the face of the bed platform, to separate the 6" gaps between the support beams, and the table. These 6" gaps will become a great place for storage!! These plywood pieces were screwed to the frame as it was assembled, however we had to wait until we got the Thinsulate insulation before we could cover the front of the support beams. Therefore, a couple weeks time would pass until we could continue assembling the frame in the van.
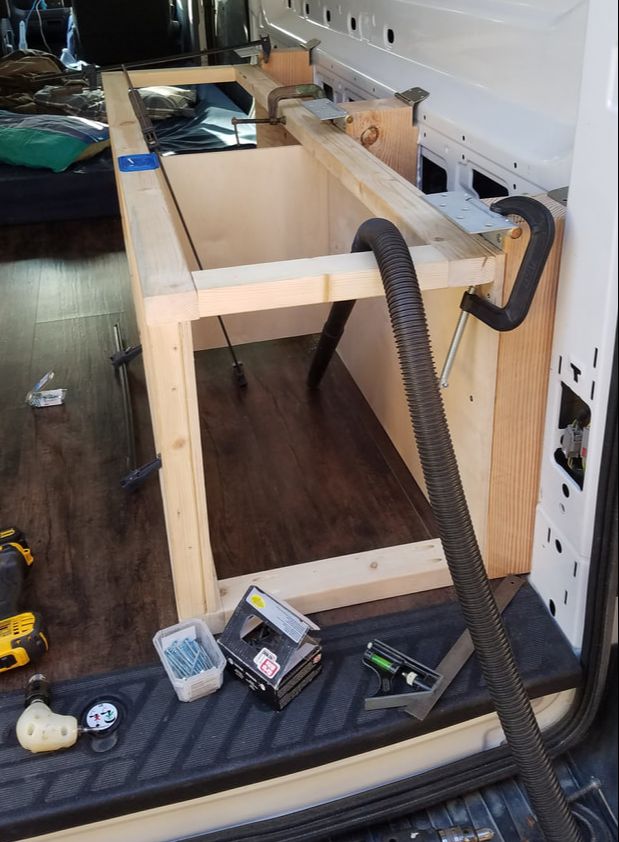
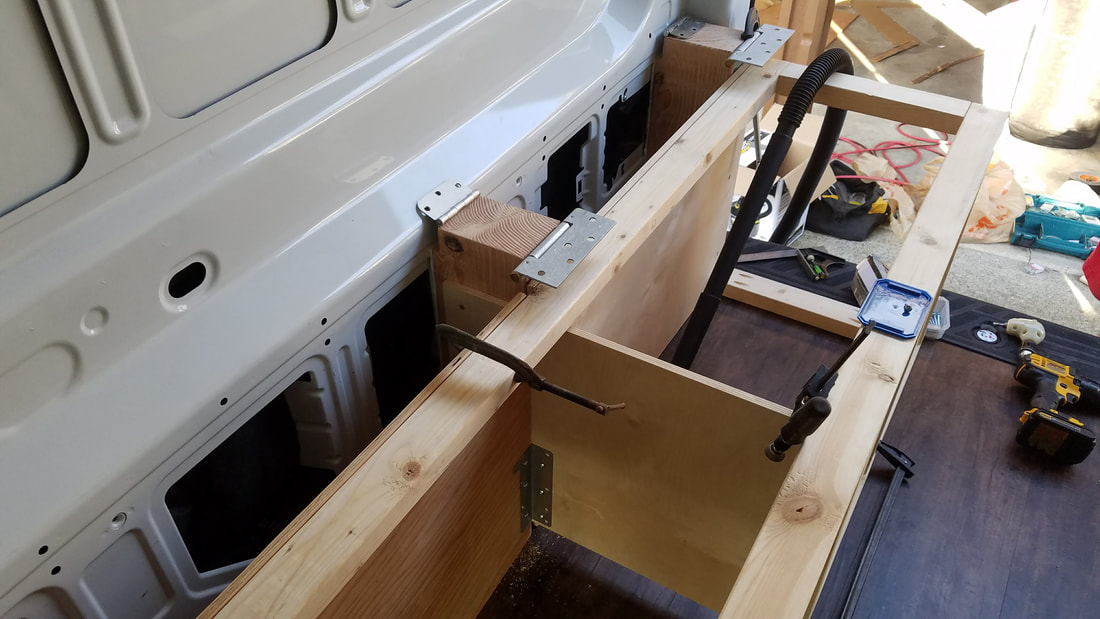
So, I eventually managed to drive from Edmonton back to Seattle for a long weekend to get our insulation (among other things). I won't go into much detail about the Thinsulate installation here (see this article for more details on that), but after filling the portion of the wall that would be covered by the table with Thinsulate, I was able to complete the assembly of the frame with help from my dad at home in WA. Unfortunately Elaine couldn't make the trip to WA with me so this next part was just my dad and I. He had many extra C-clamps which helped to pull out any bowing in the studs as I screwed the frame to the bed supports. I added a piece of plywood that bisected the frame through the middle, which will be the separation for the two sets of drawers. This piece was screwed to the front of the middle support beam. Note that none of the plywood or stud pieces connecting the frame to the supports were glued in case it ever needed to be removed later. Only the joints within the frame itself were glued. See photos below. |
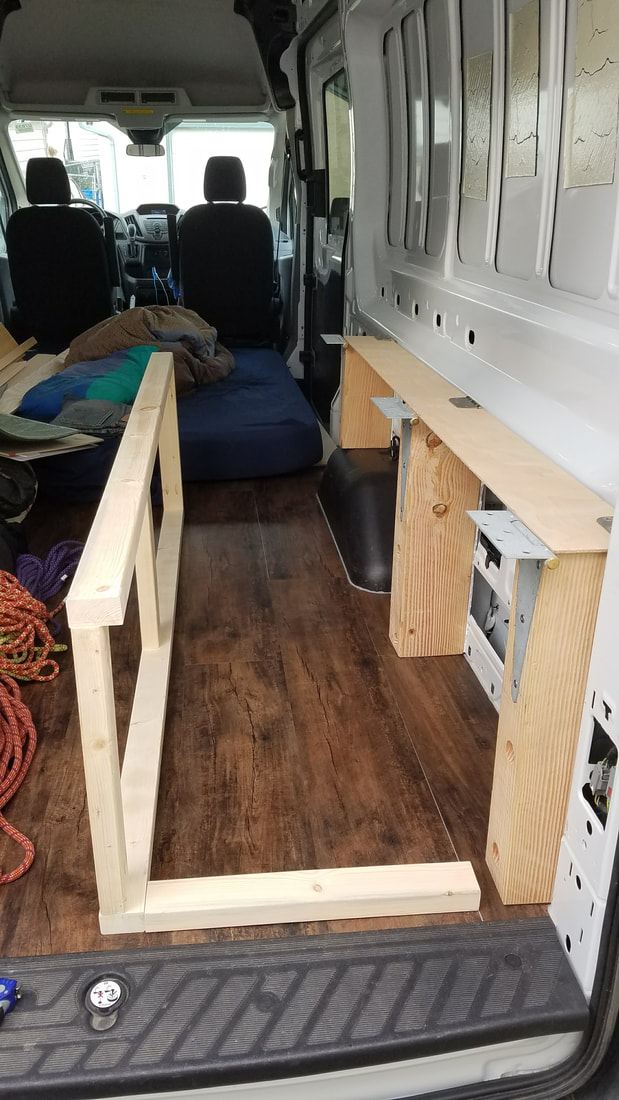
Test fitting part of the frame
|
One piece of plywood done! The hole on the front half will be for drawers.
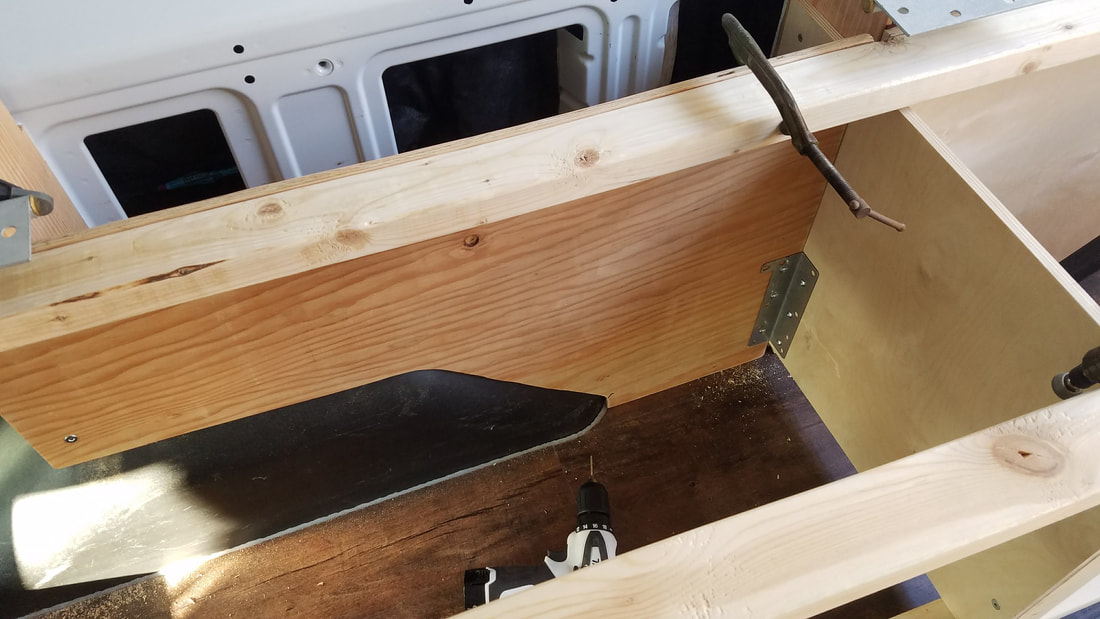
Had to cut this piece of plywood around the wheel well, and secure to the middle piece with an angle bracket. The 6" gap behind it will become storage.
|
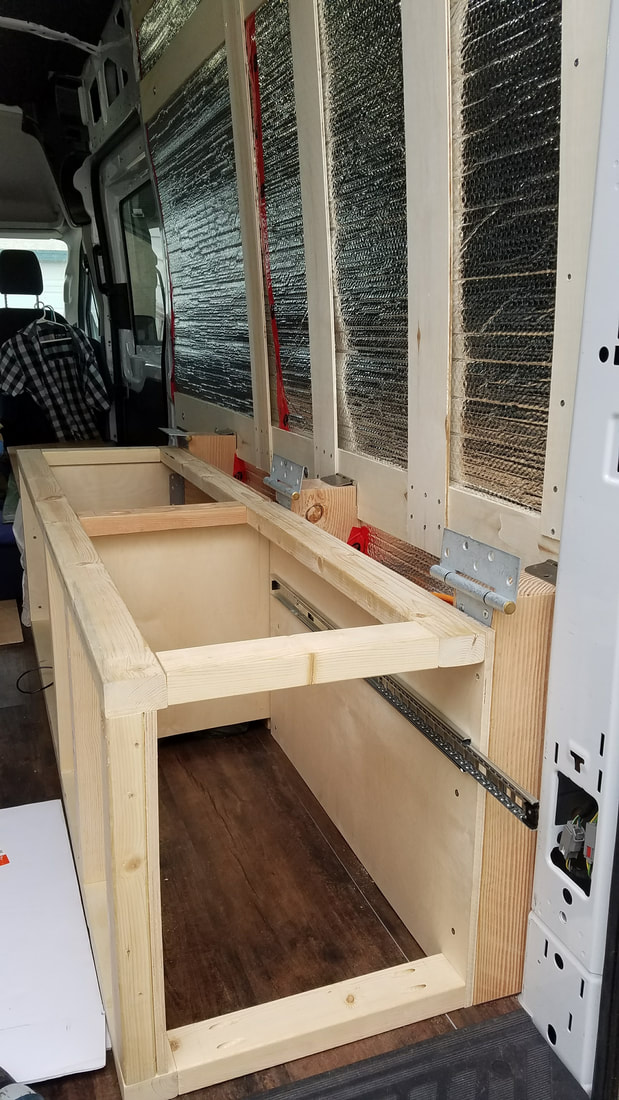
Good progress installing the frame. Notice the plywood now covering the face of the support beams, and the plywood bisecting the frame in half. This will mark the separation between the two sets of drawers. Also notice the 1.75" gap between the hinge and top of frame.
A completed table frame!
|
Step 2 - Cut and Glue the Hardwood Tabletop

Gluing the two pieces of Sapele together
|
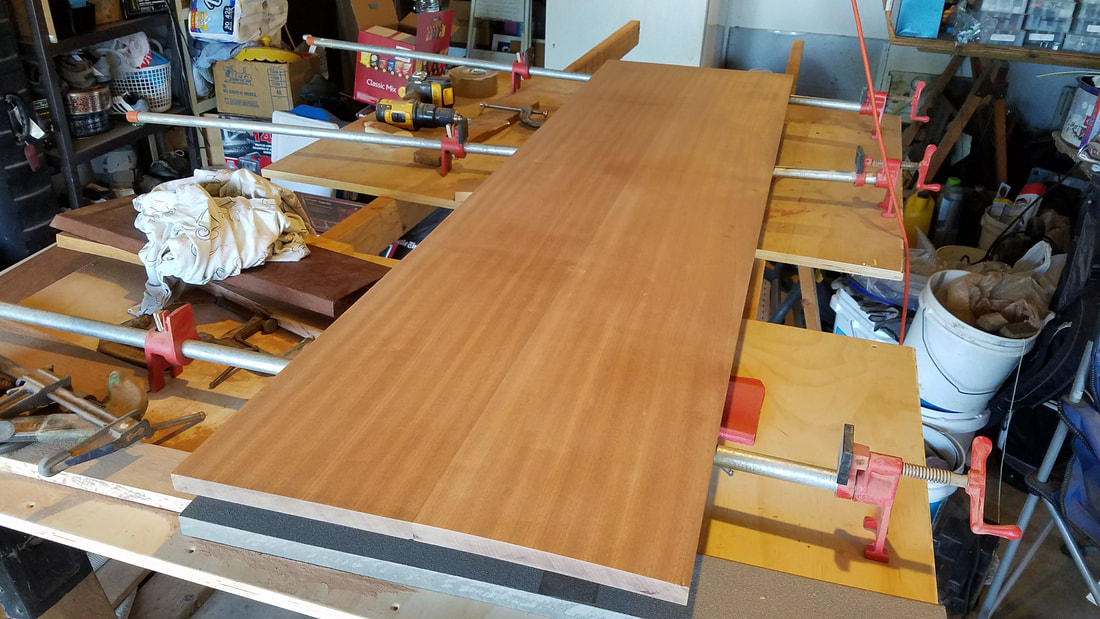
Pieces are completely flush, and we now have a beautiful tabletop.
|
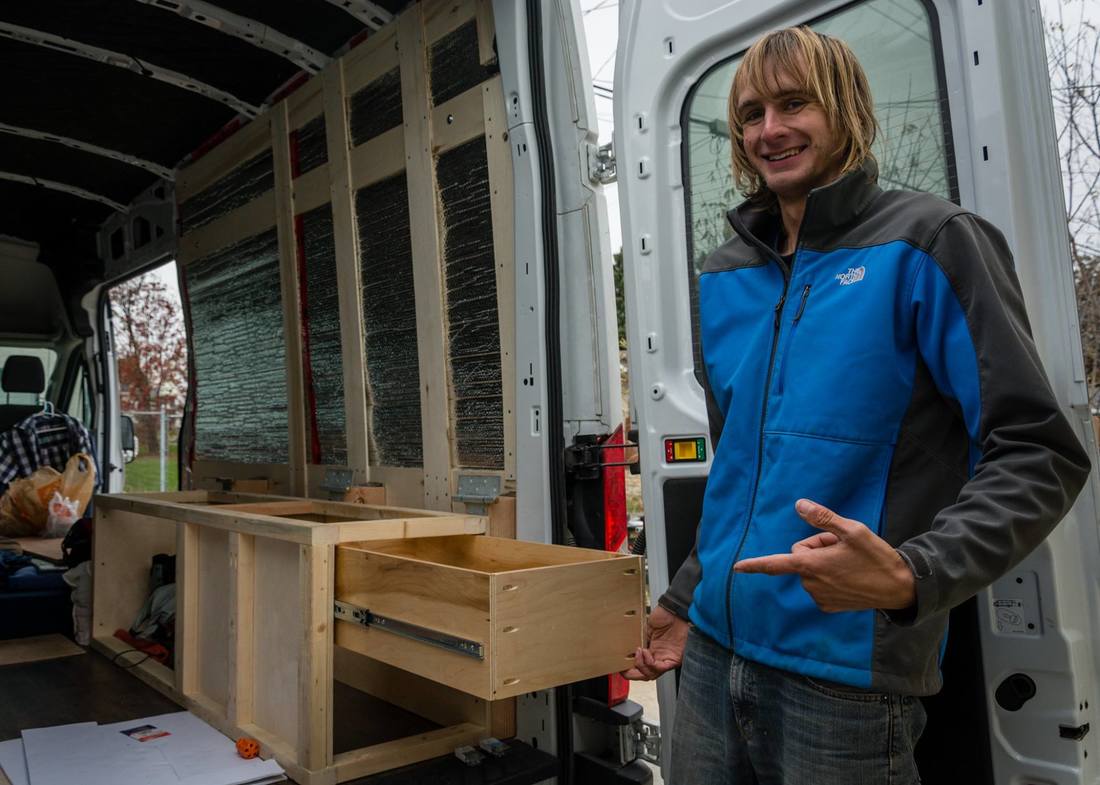
Step 3 - Build and Install the Drawers
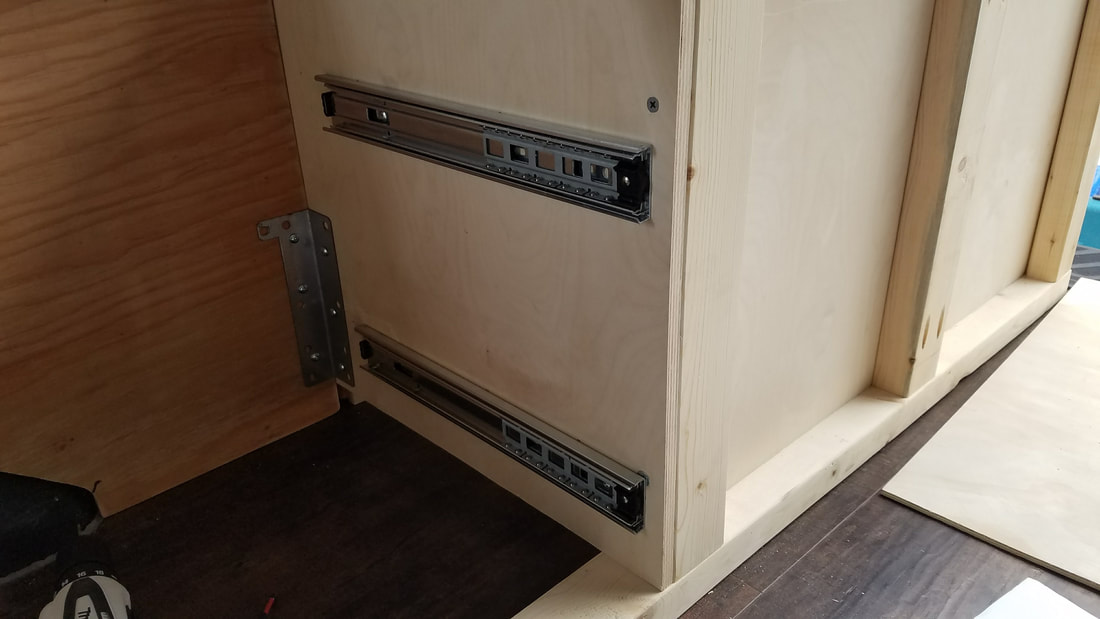
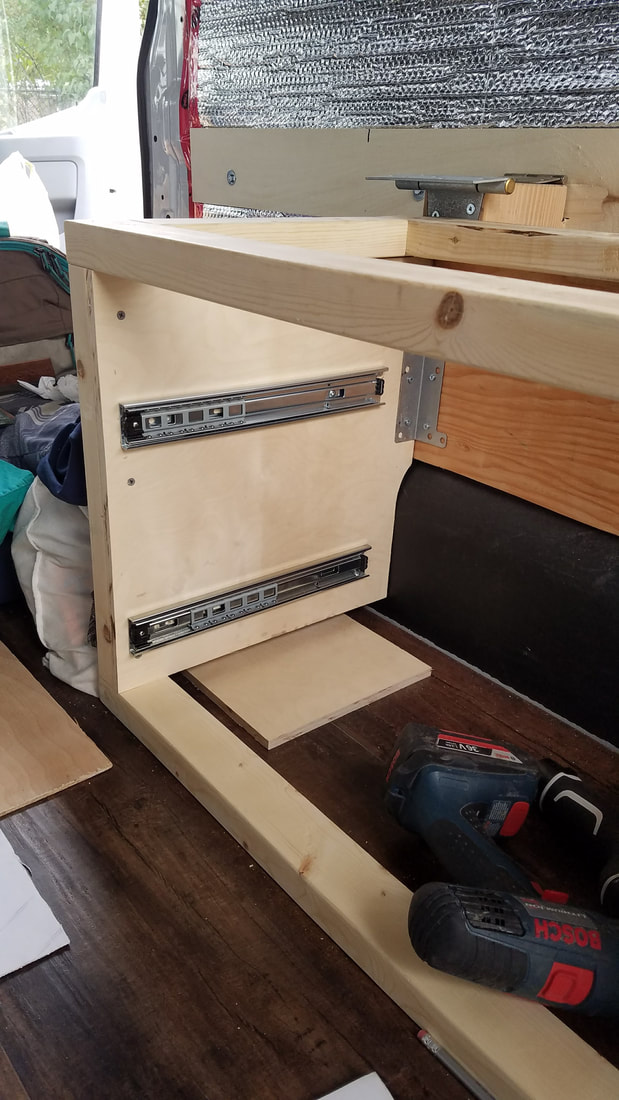
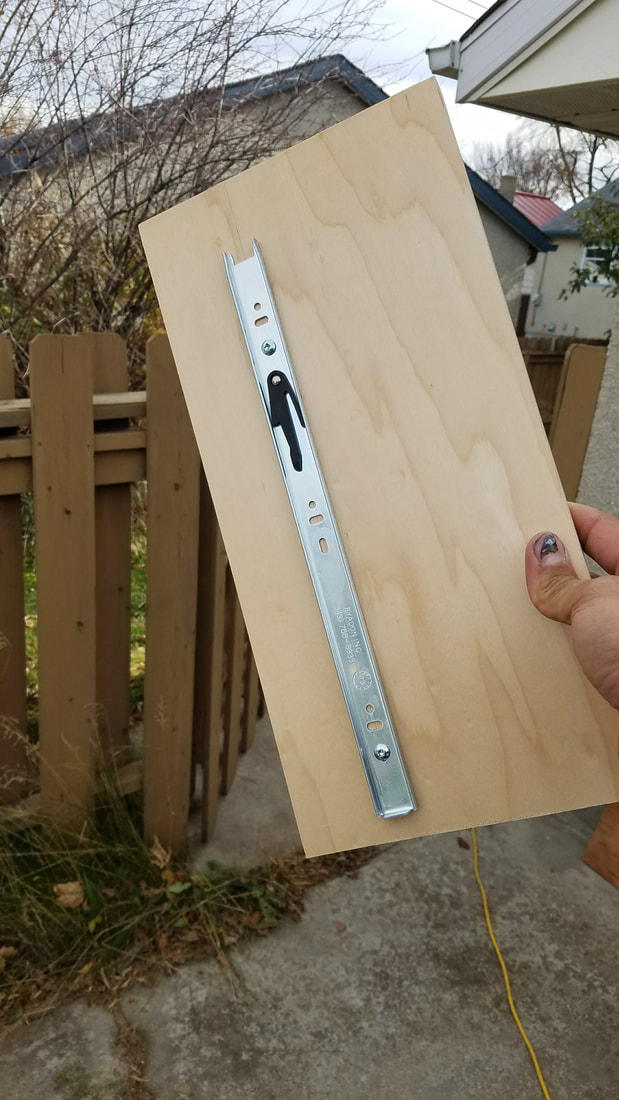
First step was to screw half of each drawer slide onto the side of the cabinet frame. Where ever we decided to screw these into would dictate exactly how we would build the rest of the drawer, so even though there was lots of flexibility in this step, we had to make sure they were at least level, and spaced well enough to allow 2 drawers to fit. For the drawer in the back we simply located the slide just below the center of where the drawer would be. Since the plywood inside the frame is 1/2" thick, and the metal on the drawer slide is 1/8" thick, half inch screws worked perfectly to hold them in place. The slides have various oval shaped holes you can put your screw into, and then be able to slide it one way or another a small amount for final placement. Note each drawer slide is 2 inches shorter than the length of the drawers they are intended for to allow wiggle room.
With the drawer slides mounted to the inside of the drawer boxes, we measured the length of the sides for each drawer, and cut those using the pre-finished drawer side boards I found in Seattle. Working first on the back drawer, we cut the sides to our length of 32 inches, measured where exactly the top of the drawer would be relative to the drawer slide we just installed in the cabinet, then screwed the other half of each slide onto each side piece. This part had to be EXACTLY correct or the drawer would not fit correctly.
Rear drawer slide (30 inches long) installed into the rear drawer box, which is 32 inches deep. Also notice the Reflectix insulation and furring strips for the wall!
|
Two 14 inch slides for 16 inch long drawers - Right side
|
Left side
|
|
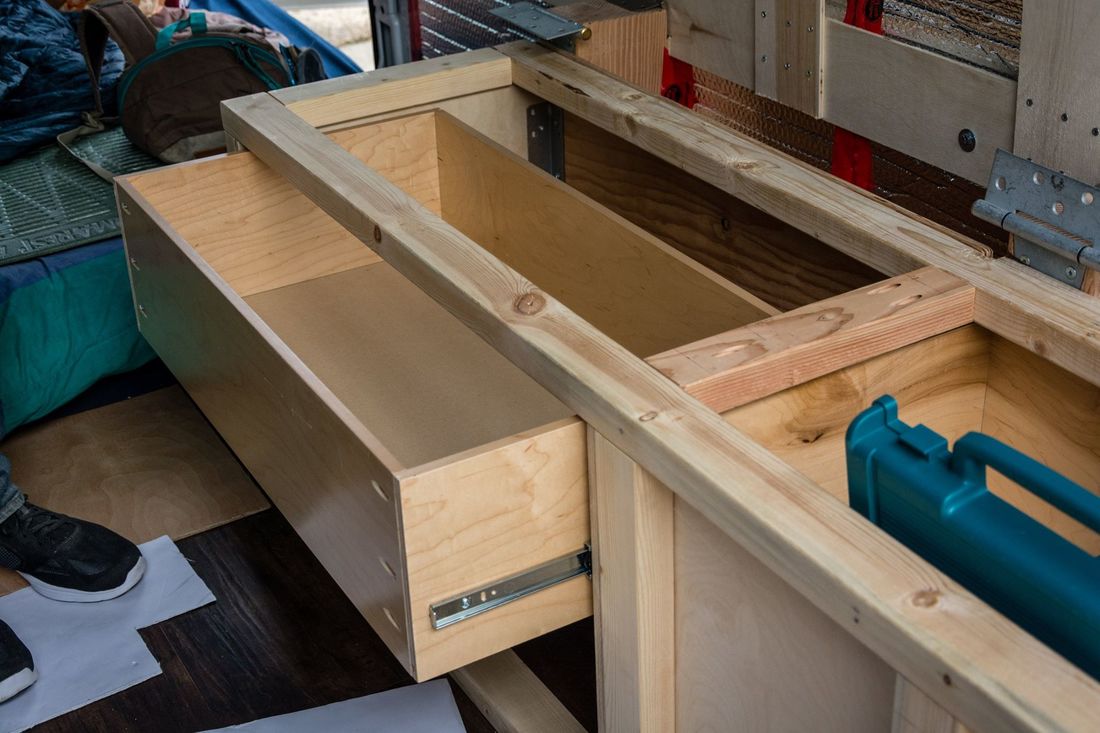
With the drawer sides cut, we slid them into their corresponding slides and confirmed the ends were flush with the 2X3 studs in the table frame (so the face board would set flush when the drawer is closed). We adjusted the slide accordingly if it wasn't perfectly flush, and measured the distance between the sides for the front and back of each drawer. Using these measured lengths, we then cut our front and back pieces. Then, using the Kreg hole jig we drilled three holes on each end of the front and back drawer pieces, making sure they would be on the hidden faces of the drawer (the front will get hidden by the drawer face board). For 1/2" material, the Kreg instructions sheet says to place the end of the jig 1/4" beyond the end of the work-piece, set the collar on the included drill bit to 3-1/8" and use their 1 inch screws. It's foolproof!...just as long as you clamp the jig every time you drill a hole. This will provide a much stronger connection than simply screwing the drawers together from the ends.
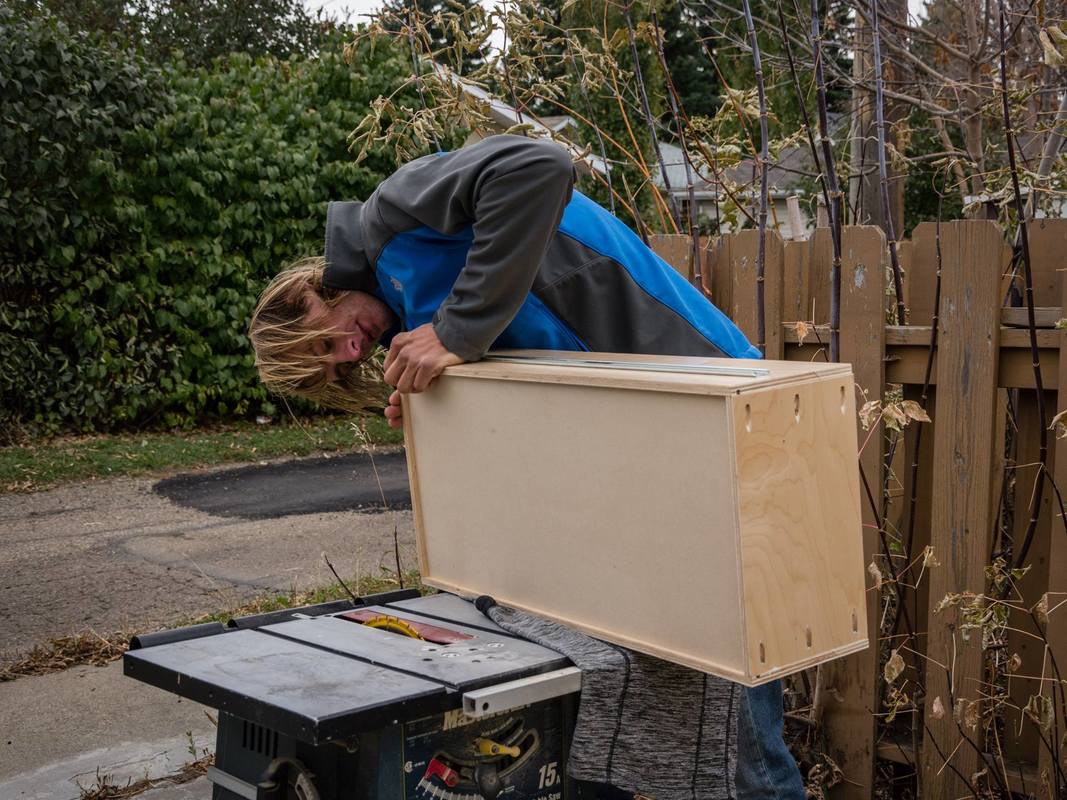
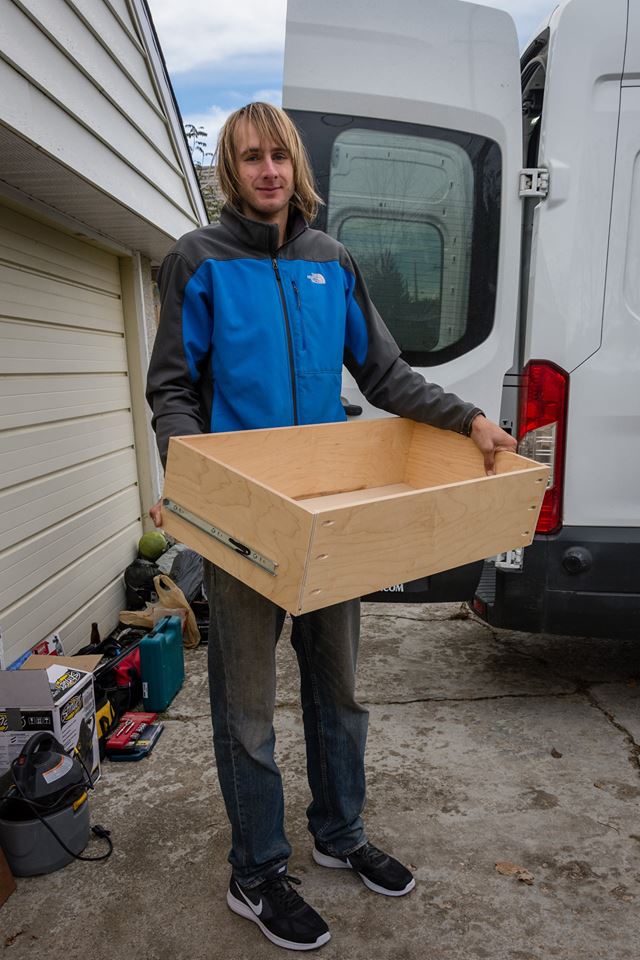
Next we borrowed a small table saw from our neighbor, who was nice enough to allow us to use it, and we cut a 1/4" wide dato (fancy word for a groove) along the bottom of each drawer side piece with about 3/8" separating the dato from the very bottom of the board. To do this I set the fence on the table saw, raised the saw blade about 1/4" (to make the depth of the dato) and ran a test piece through to make sure the depth was correct. Then ran each piece through making sure to make the dato on the INSIDE face of each drawer, as well as on the bottom ends. Since the saw blade is only 1/8" thick, we had to make a second pass on each piece, which I first tested on the practice board and made sure the 1/4" thick hardboard would fit before proceeding to make the second pass on each drawer side. Now we were ready to assemble the drawer! We started by gluing and screwing the two sides and the back pieces together, so we ended up with a big "U" shaped thingy, then measured the inside dimensions and added 3/8" to each length for the drawer bottom (1/4" groove X 2, minus 1/8" wiggle room for the bottom). We then used the table saw to cut the hardboard to the calculated dimensions. Once cut, we slid it in the groove and made sure the fit was perfect before gluing and screwing the front piece, which completed the assembly of our drawer box. With the rear drawer assembly completed, we had our moment of truth, as we attempted to fit it inside the slides attached to the cabinet walls and.... |
Notice the three holes on each end of the drawer back drilled using the Kreg hole jig.
|
|
|
It fits!
|
Second drawer fits!
|
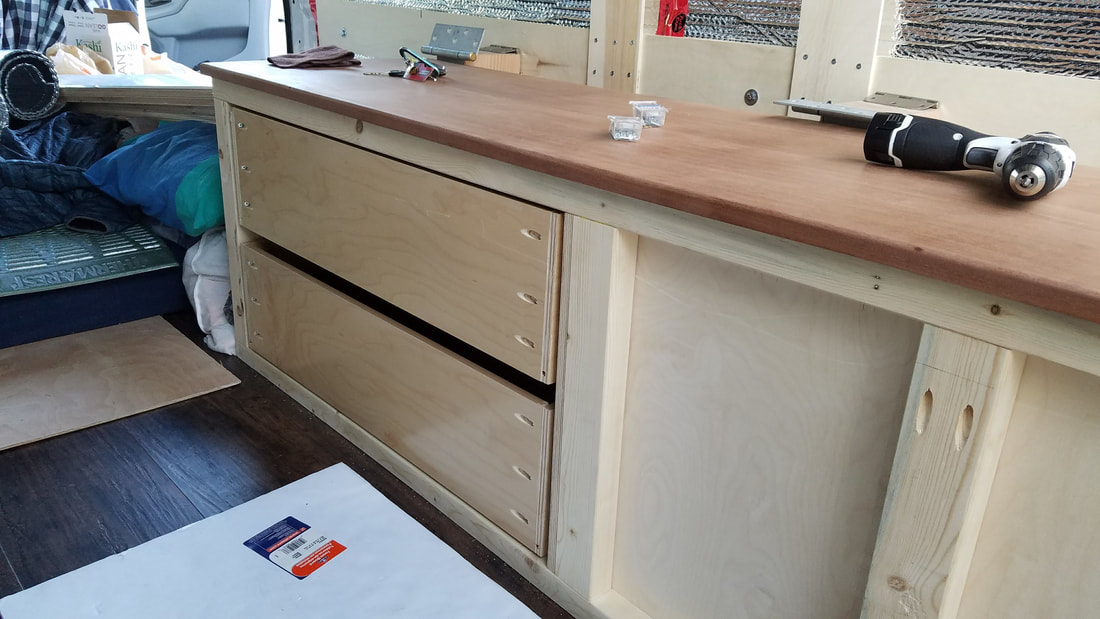
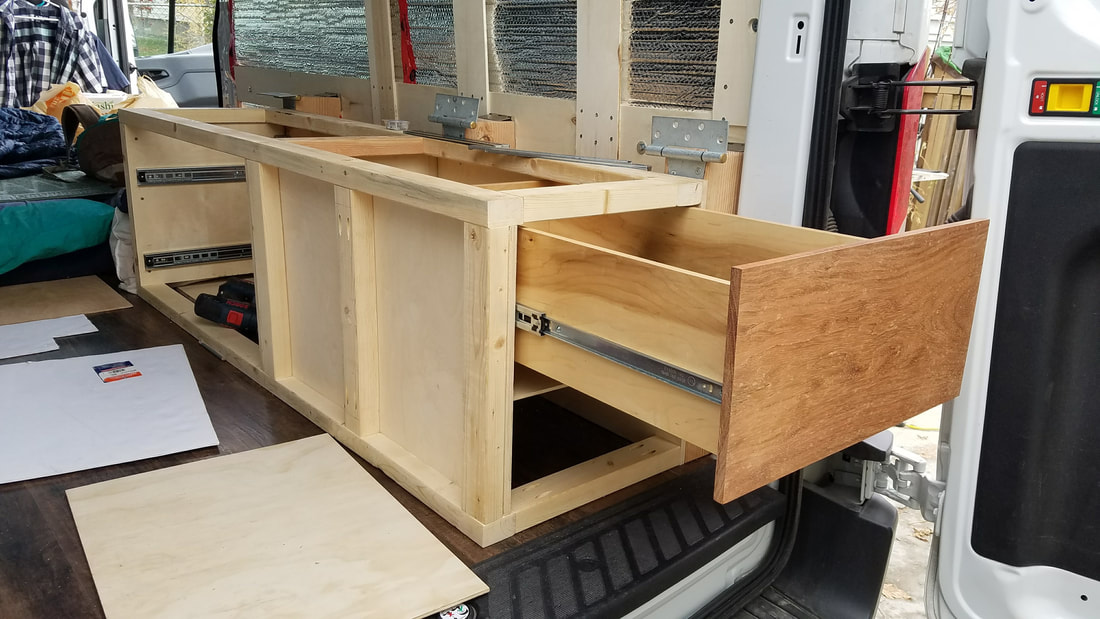
All 3 drawers fit! Also notice the now installed tabletop!
|
First drawer face secured to the front of the rear drawer!
|
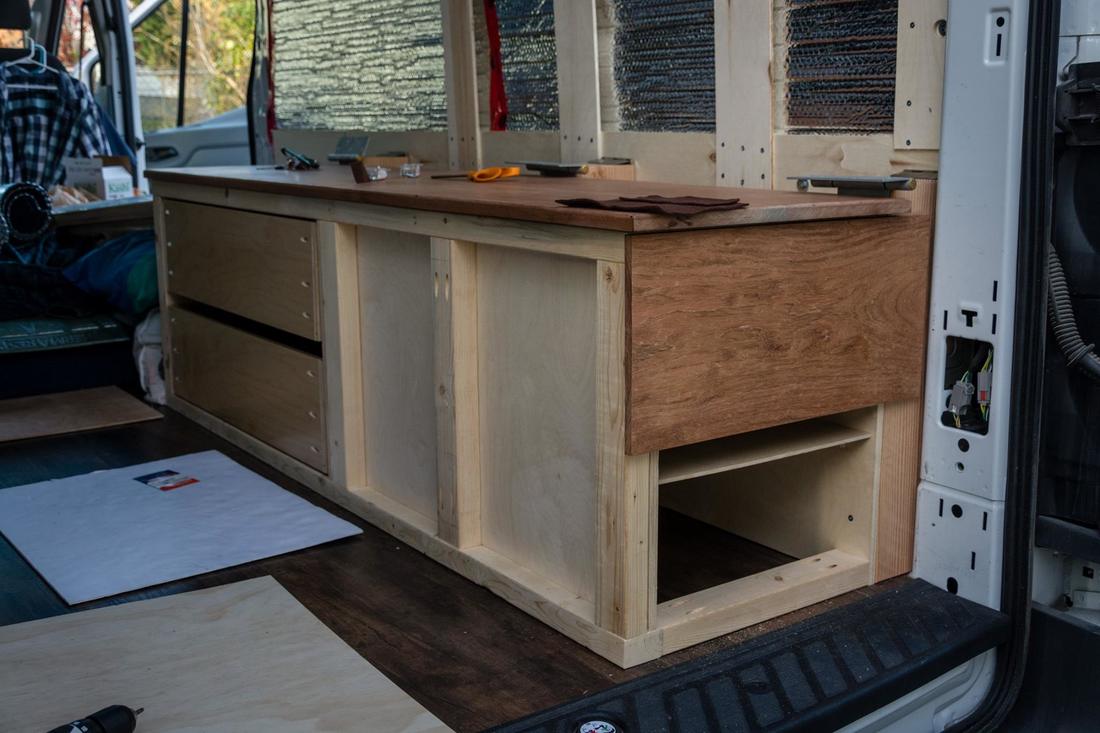
Rear drawer face when closed. Notice how it covers the studs, AND the large bed support on the right edge. Also notice the small shelf.
|
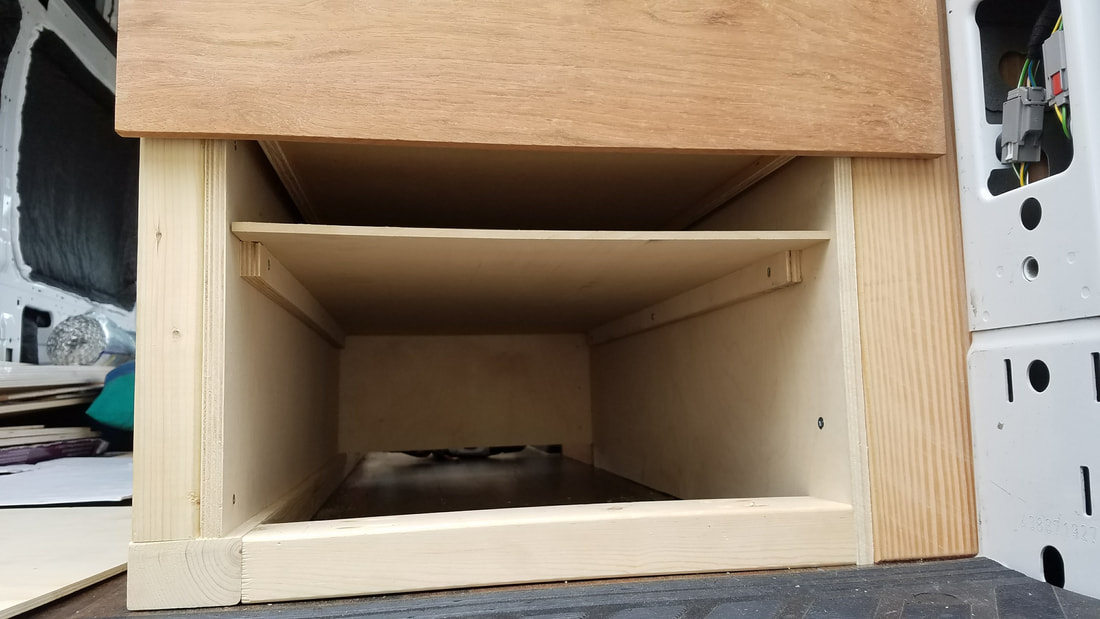
Small shelf detail. The large space below the shelf will be additional storage, with a door.
|
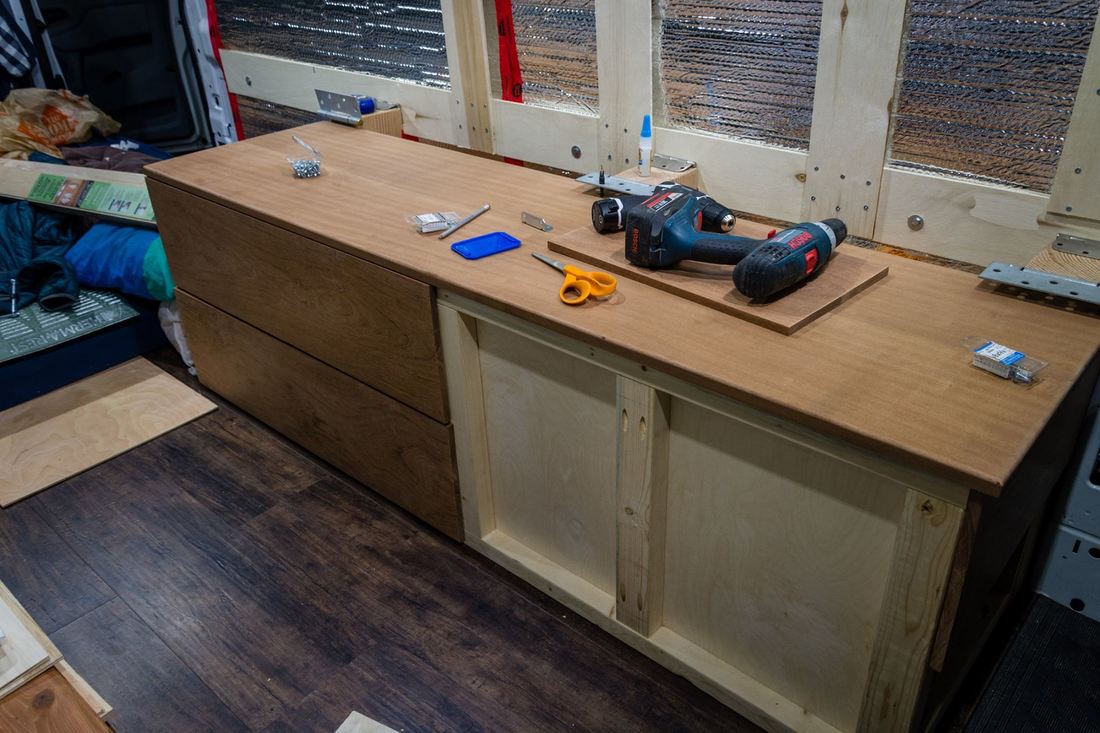
All 3 drawers and the table top completed!
|
Step 4 - Install the Rear Door

Bottom door with hinges closed
|
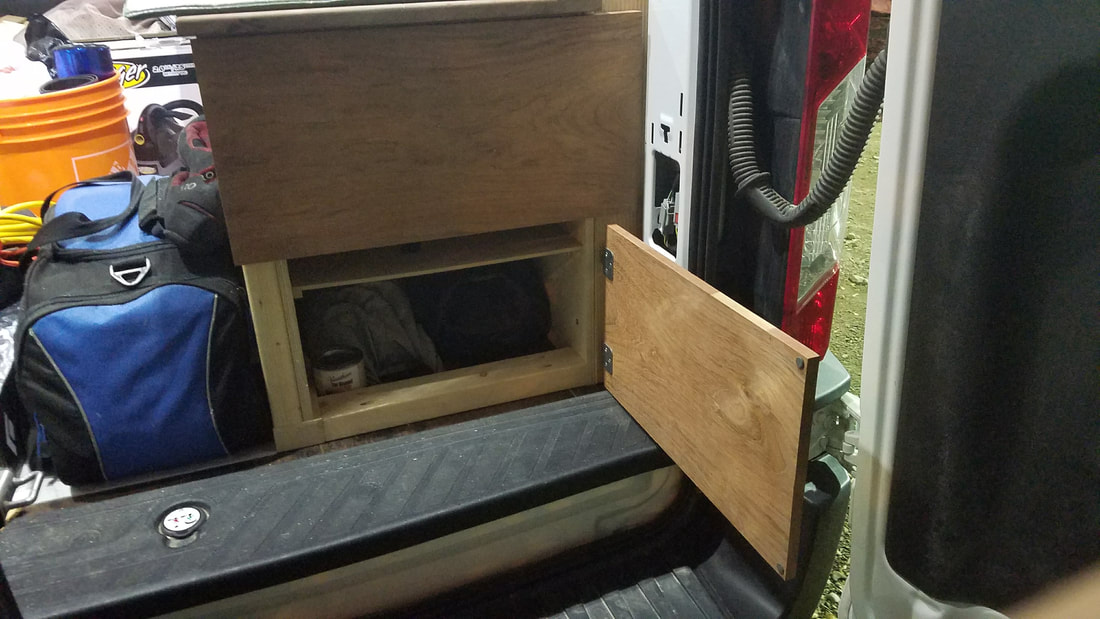
And opened
|
Step 5 - Add the Table Extension
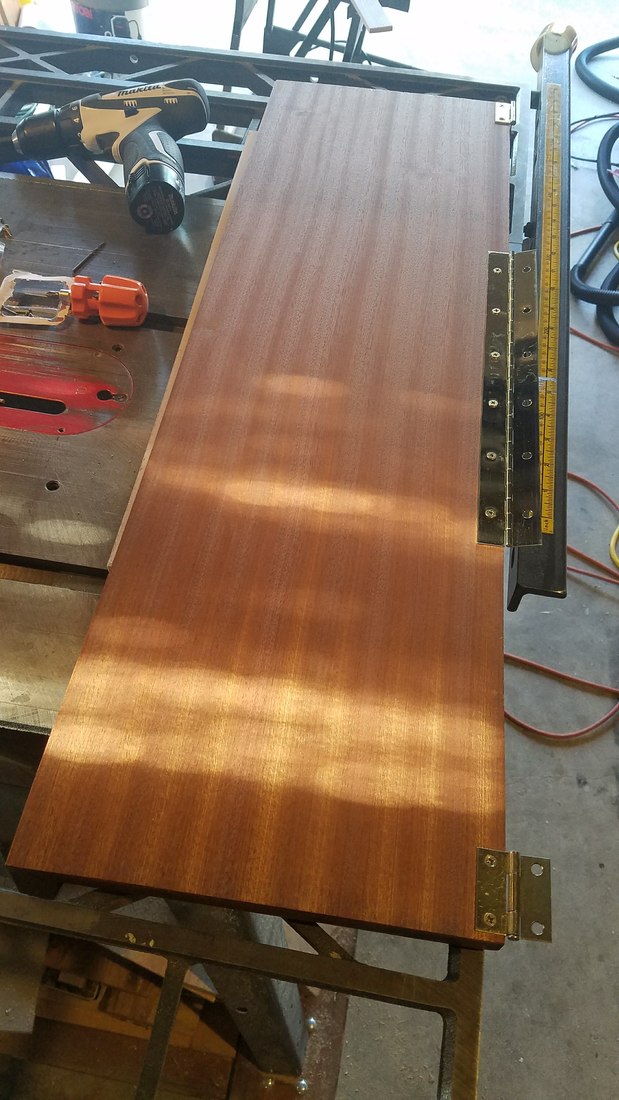
Attached all the hinges to the table extension piece
|
Table extension open
|
Step 6 - Finishing
-
{{#owner}}
-
{{#url}}
{{#avatarSrc}}
{{name}} {{/url}} {{^url}} {{#avatar}} {{& avatar}} {{/avatar}} {{name}} {{/url}} - {{/owner}} {{#created}}
- {{created}} {{/created}}