Refrigerator
Materials used
- One (1) pair of 18" soft close drawer slides ($21.99 at Home Depot)
- 2' X 4' piece of furniture grade 3/4" thick finished plywood ($25.74 at Home Depot)
- 2' X 4' piece of 1/2" thick birch plywood ($22.62 at Home Depot)
- Eight (8) 90 degree angle brackets ($2.59 each at Lowes)
- 1/2" long pan head wood screws pack of 50 ($4.68 at Home Depot)
- 3/4" long pan head wood screws pack of 50 ($4.87 at Home Depot)
- Kreg 1" screws and wood glue (Purchased earlier)
tools used
- Palm Sander
- Drills and Bits/Drives
- Kreg Hole Jig
- C-Clamps
- Pipe clamps
- Streightedge and Measuring Tape
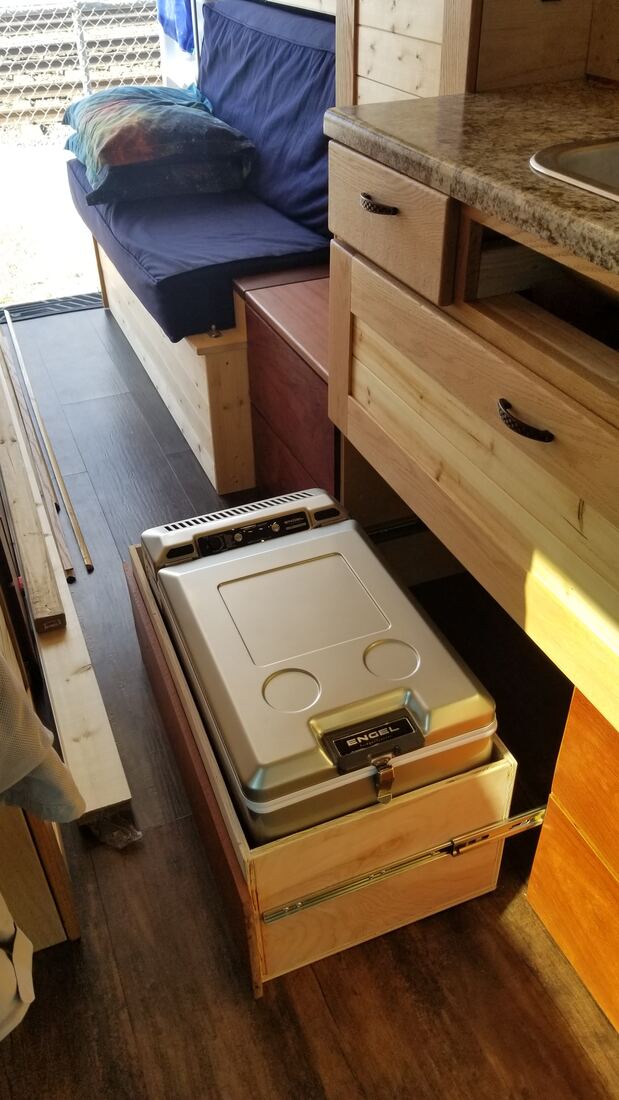
step 1 - build the refrigerator drawer
When I test fit the drawer, it fit nearly perfectly. I just had to make a small adjustment to the partition I had just installed. Next, I installed the drawer slides onto the drawer, which required extensive measuring. Since thefridge is heavy, I drilled some additional screws to hold the slide onto the sides of the drawer. The 1/2" plywood sides could only take 1/2" screws so I needed to have more than just 3. I then secured one of the two pieces of Jatoba hardwood on the face of the drawer, screwing it on from the inside. Unfortunately, the upper piece was too warped to use and I wasn't able to get it to fit flush. Jatoba is a very hard wood and if it isn't perfectly straight when you buy it, it'll never be. I had to find a different specialty hardwood store in Denver (since I had purchased all my redwoods I used in the van from Crosscut Lumber in Seattle). Amazingly there are many options in Denver and I found a great store that had Jatoba in stock. Even though the grain won't match all the other Jatoba pieces I have in the van, it'll at least be streight! The last thing I did was run the power cable to a 12V socket where the cord could easily be unplugged when the fridge isn't in use. I had to find a way to allow the cord to move freely in and out when the drawer is opened. To keep the large drawer closed, I added another cam lobe I had available from the stock I bought off a fellow climber from Mountain Project to the adjacent door for the electrical cabinet. This lobe will swing around and secure along the edge of the drawer, keeping it closed until you swing the cam back to the left.
Step 2 - Wire in the fridge
-
{{#owner}}
-
{{#url}}
{{#avatarSrc}}
{{name}} {{/url}} {{^url}} {{#avatar}} {{& avatar}} {{/avatar}} {{name}} {{/url}} - {{/owner}} {{#created}}
- {{created}} {{/created}}