Bookshelf Installation
Introduction
Materials Used
- Extra 8' pine panel boards (Purchased Earlier)
- Extra 2" X 3" by 8' scrap studs (Purchased Earlier)
- Extra 90 degree angle iron (Purchased Earlier)
- Rivet Nuts and 1/4" by 20 count bolts (Purchased Earlier)
- Two (2) Liberty Brand Inlay Cabinet Hinges ($6.59/Pair at Home Depot)
- Extra 1/2" Birch Plywood (Purchased Earlier)
- Two Grip Clips for holding door closed ($1.99 each at Mclendon Hardware)
- Apexstone 18lb Gas Strut Pack of 2 for holding door open ($7.99 on Amazon)
- Stainless steel cabinet spring toggle clamp set of 4 ($12.07 on Amazon)
Tools Used
- Router with Various Bits
- Palm Sander
- Drills and Bits/Drives
- Kreg Hole Jig
- C-Clamps
- Pipe clamps
- Carpenters Square and Measuring Tape
- Socket Set
- Vice Grips and Box Wrenches (For Installing Rivet Nuts)
Step 1 - Build Frame
|
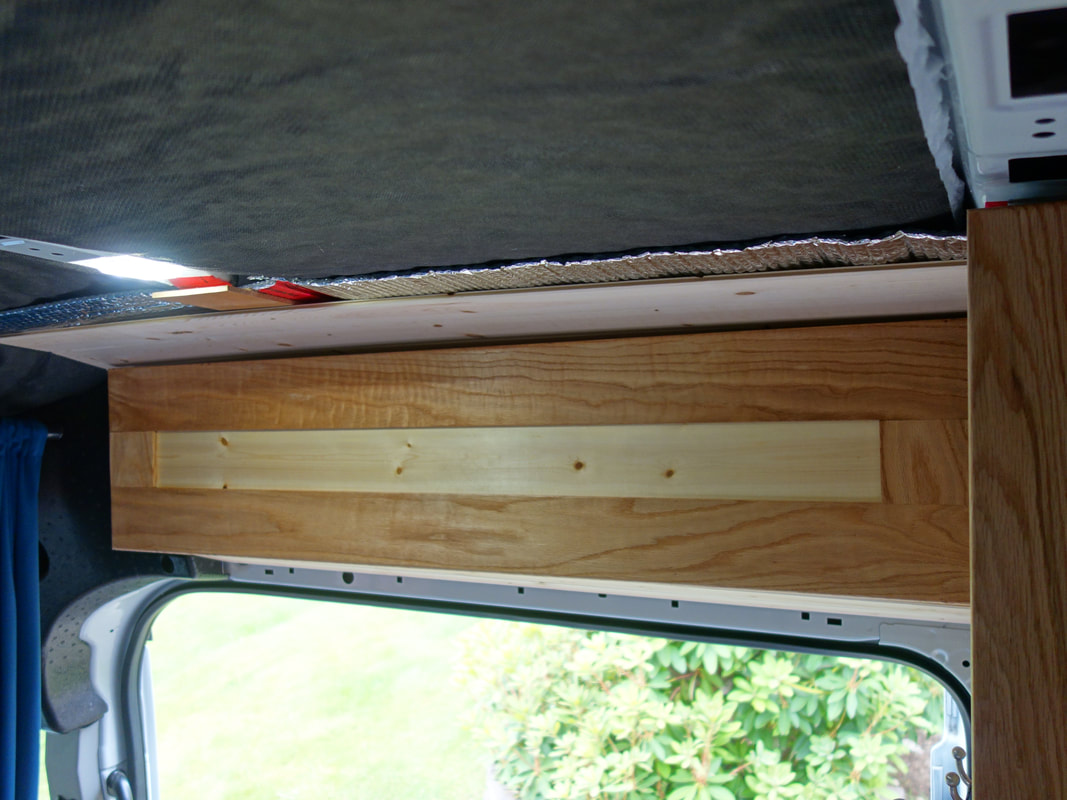
The frame for this small shelf would be pretty simple with just a few "U" shaped pieces secured to the inside van panel with 90 degree metal brackets. I had to use the table saw to rip the short pieces to match the odd angles of the upper side paneling above the sliding door. Also, since I wanted the actual shelf to be angled up a bit, I also had to cut the ends of each piece at different angles to make this possible. Once each piece fit in place, I used the Kreg hole jig and glue to join each piece together. Before I secured them to the van I started the ceiling in this section, since it would be inaccessible after this shelf is finished. So I simply bolted a narrow strip of old plywood to one of the ceiling struts with a couple rivet nuts, then cut a few of the pine panel boards to stretch from the wardrobe to the edge of the passenger seat extending far enough inwards to clear the width of the bookshelf. Once this part of the ceiling was complete, I secured the first "U" shaped frame piece by drilling directly through the piece that butts against the van and bolted it to a rivet nut (left side of photo). For the second frame piece I was able to screw it directly to the side of the wardrobe, and into the studs there (right side of photo). I then joined the two sides with a longer stud at the top that the hinge for the door would connect to.
|
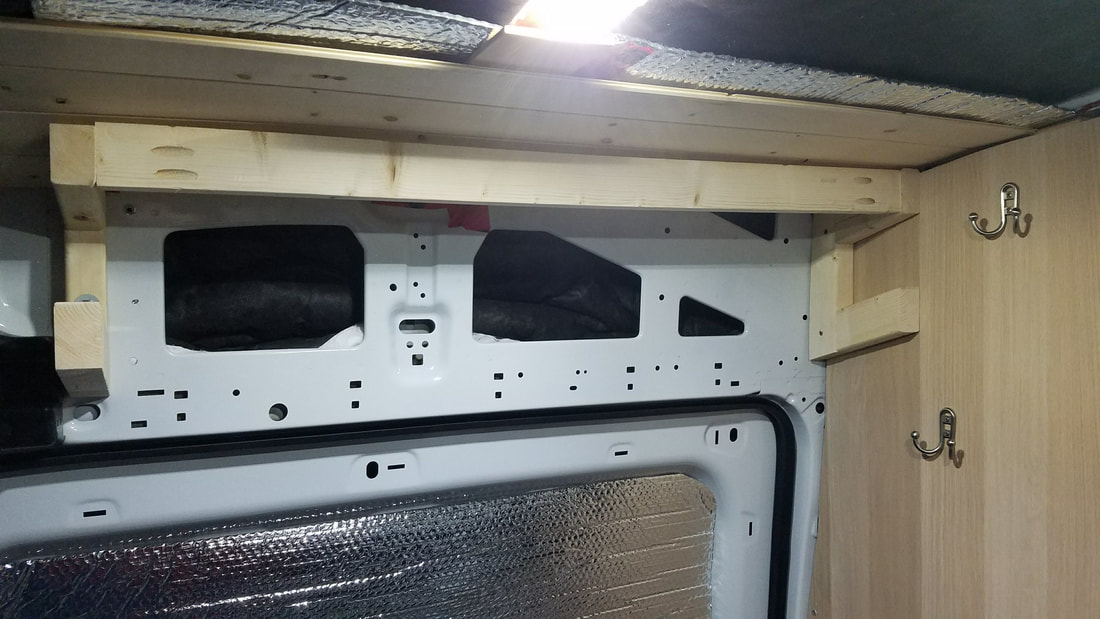
Notice the frame and how it's shaped. Door will open up on the longer piece across the top.
|
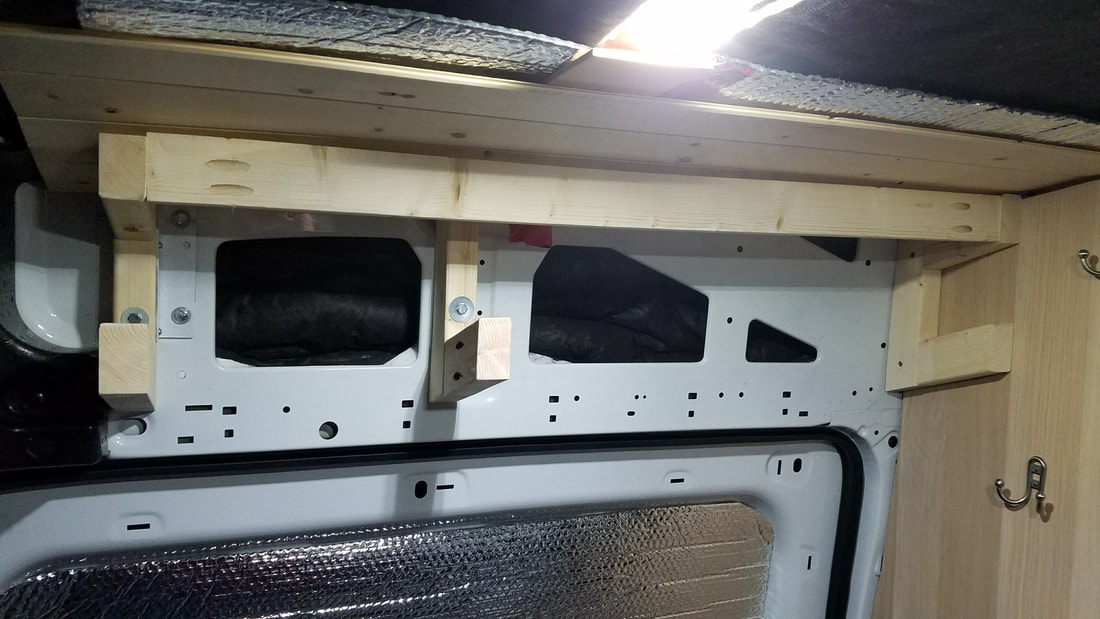
Middle frame piece installed. Also notice the white bracket on the left frame for extra strength.
|
Added the bottom shelf and a small trapezoidal piece of 1/4" thick hardboard along the left end facing the windshield.
|
Step 2 - Build the Door
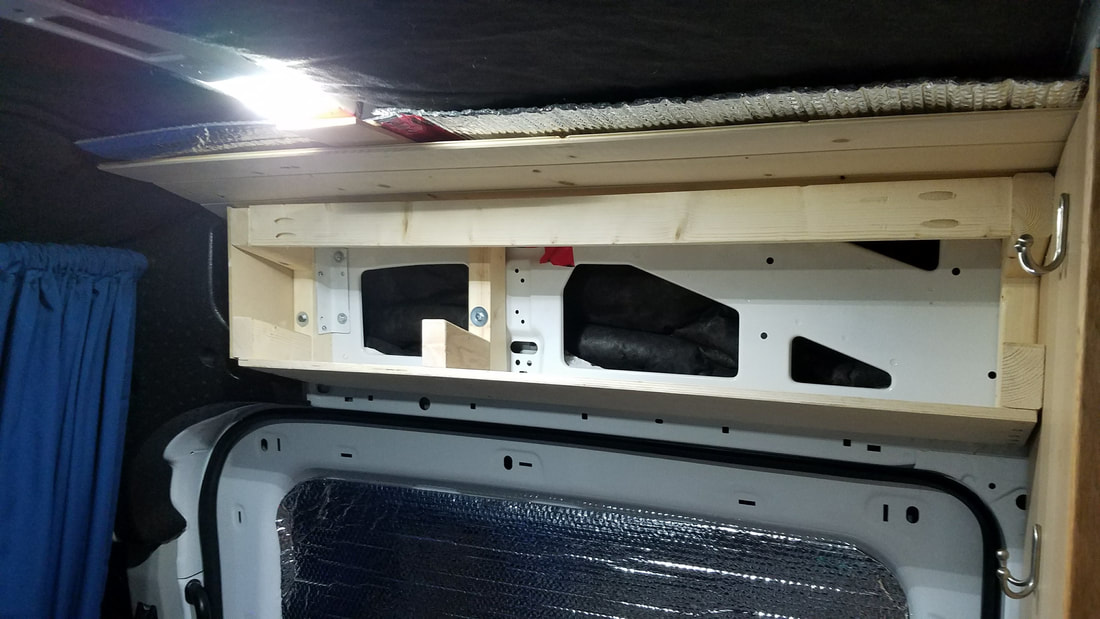
Door open with a gas strut to hold it in place while I dig for a book. Notice the slot in the stud where the hinges are inset.
|
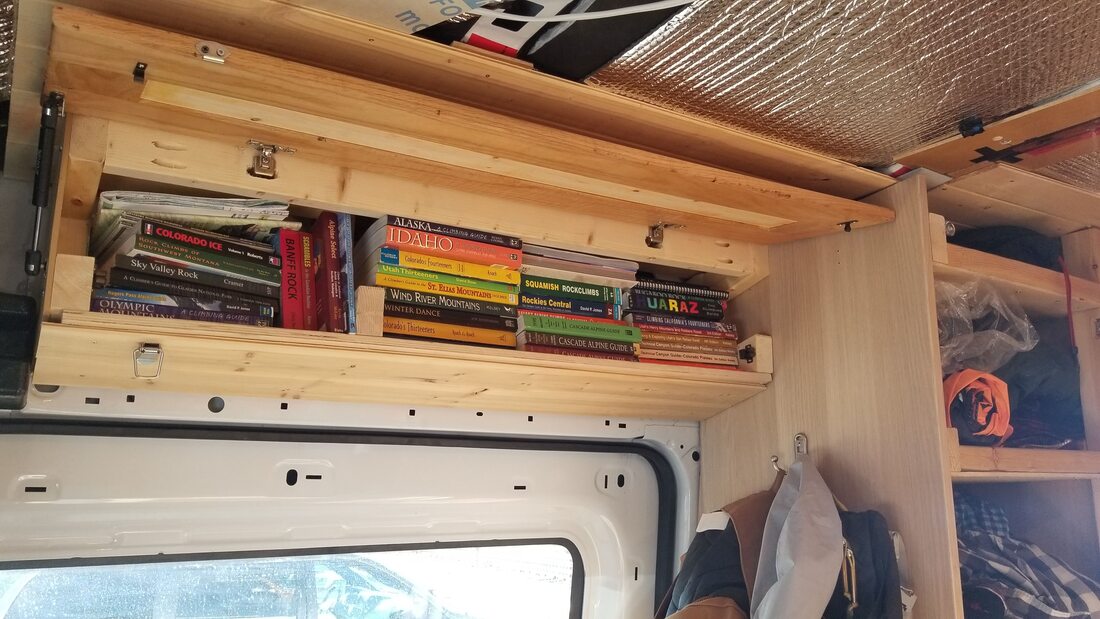
Door closed. I added some clips along the inside, and a latch along the bottom to hold the door closed.
|
-
{{#owner}}
-
{{#url}}
{{#avatarSrc}}
{{name}} {{/url}} {{^url}} {{#avatar}} {{& avatar}} {{/avatar}} {{name}} {{/url}} - {{/owner}} {{#created}}
- {{created}} {{/created}}